tryg
New Member
I decided to put in an OEM-sized but lightened pulley, manufactured by Alutec. These retail at $180. The differences are; the Alutec is made from 7075 hardened aluminum and less than half the weight of OEM. This means that the spinning mass the engine must turn is lessened.
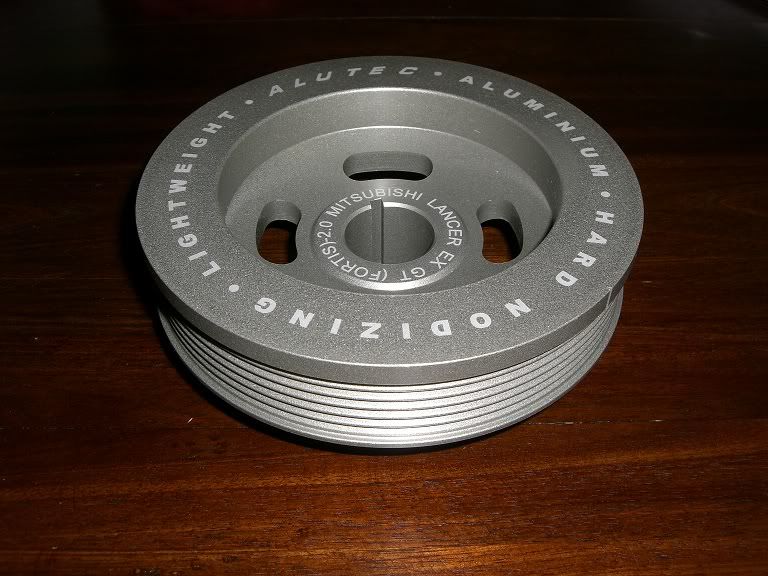
The only downside is that the Alutec does not have the bonded-rubber vibration reduction banding, which sits between the inner part of the pulley and the face, on the OEM. Some say this can lead to a more rapid deterioration of crank bearings etc... I cannot say if this is the case, but many people run these in both cars and bikes. Time will tell.
But, this is a pure DIY, not an engineering discussion.
If you intend changing out your pulley, on your own, its very, very easy, with the right tools at hand. You will need; a 21mm and 22mm socket, a 16mm spanner (open or ring but the longer the better), a flat-bladed screwdriver, a jack, a jack-stand and most importantly, access to a powerful air impact wrench. I have one that has 600nm of torque and even that struggled on my max 110psi... So be warned.
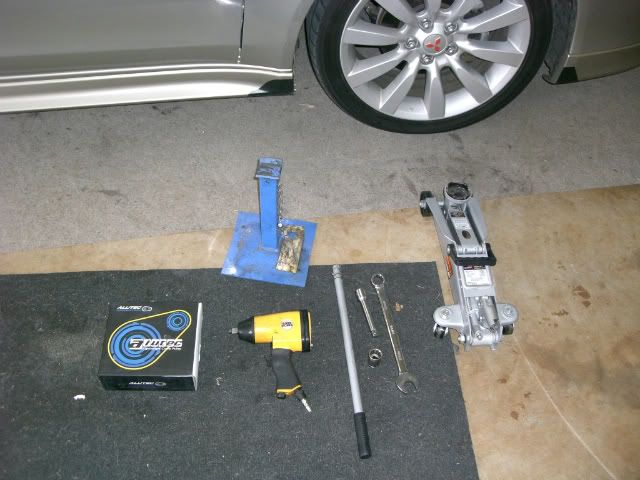
If you do have access to all these tools, you can expect it to only take 10 mins.
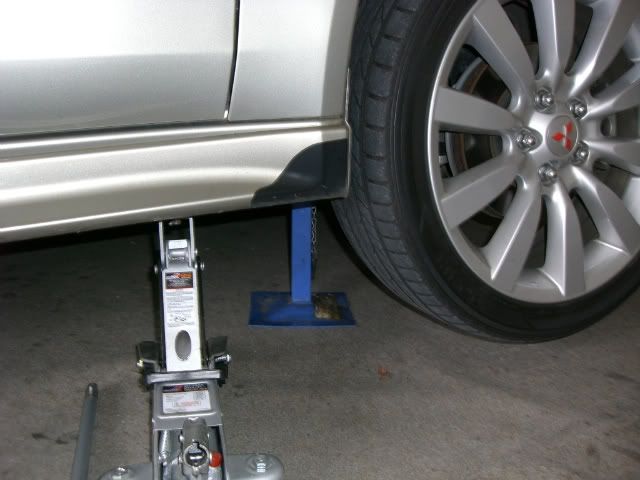
First raise the car and place the stand under. The car should sit on both the stand and the jack for maximum protection. Use your impact driver to remove your wheel nuts and remove the wheel. Place under the car also.
(notice tasty 26mm Whiteline Sway, yum!)
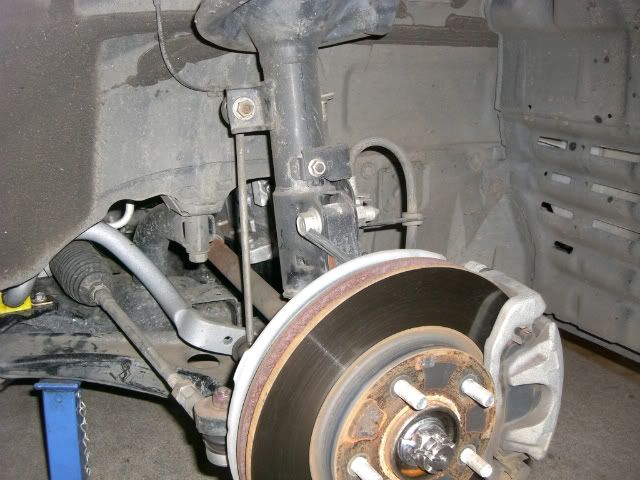
Once you have this up, and your safety is assured, identify and remove the inner plastic guard.There are about 9 pull-centre clips to remove, use your flat blade to lever gently until the head is raised, then remove. The guard is inner front.
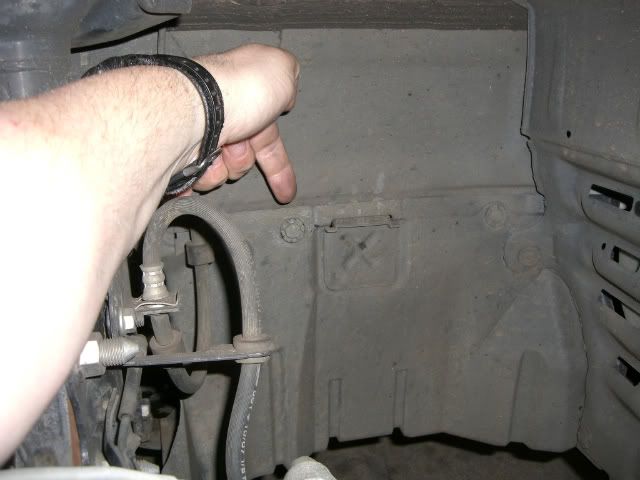
You can then pull away the guard to expose the pulley.

Now you have to grab your 16mm ring or open spanner and place it on the tensioner, which is above and slight to the right of the pulley.
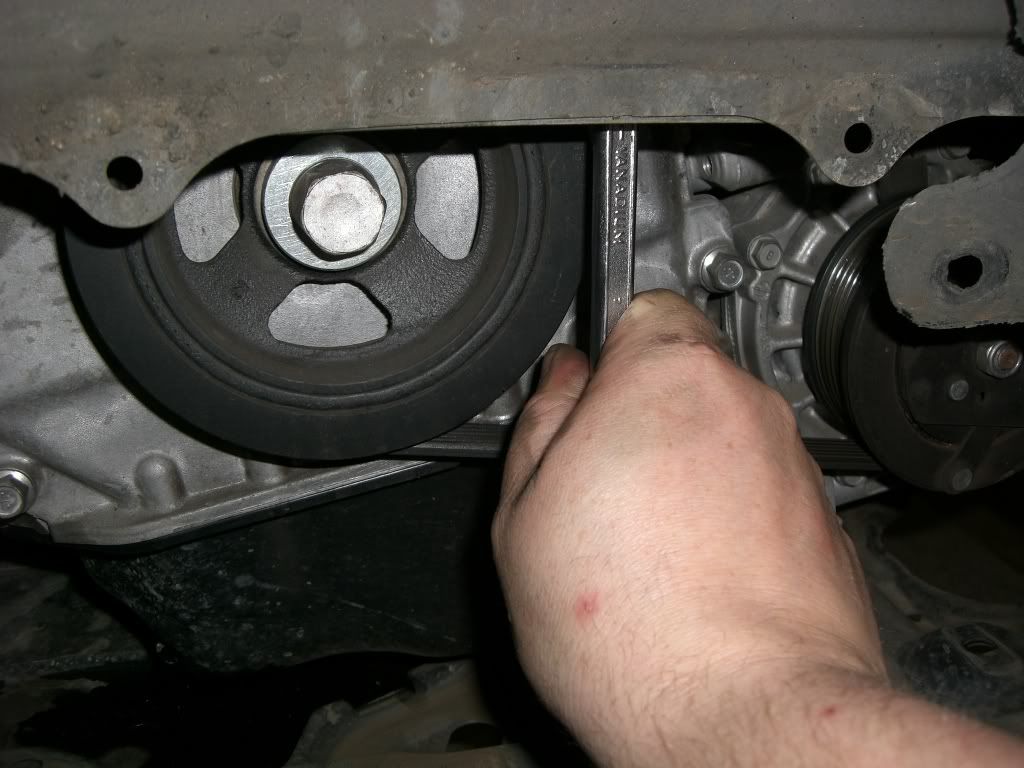
You lever this toward the front of the car, so the tension is taken off the belt... you can lift the belt off the drive pulley (the big lower one, the one you are replacing).
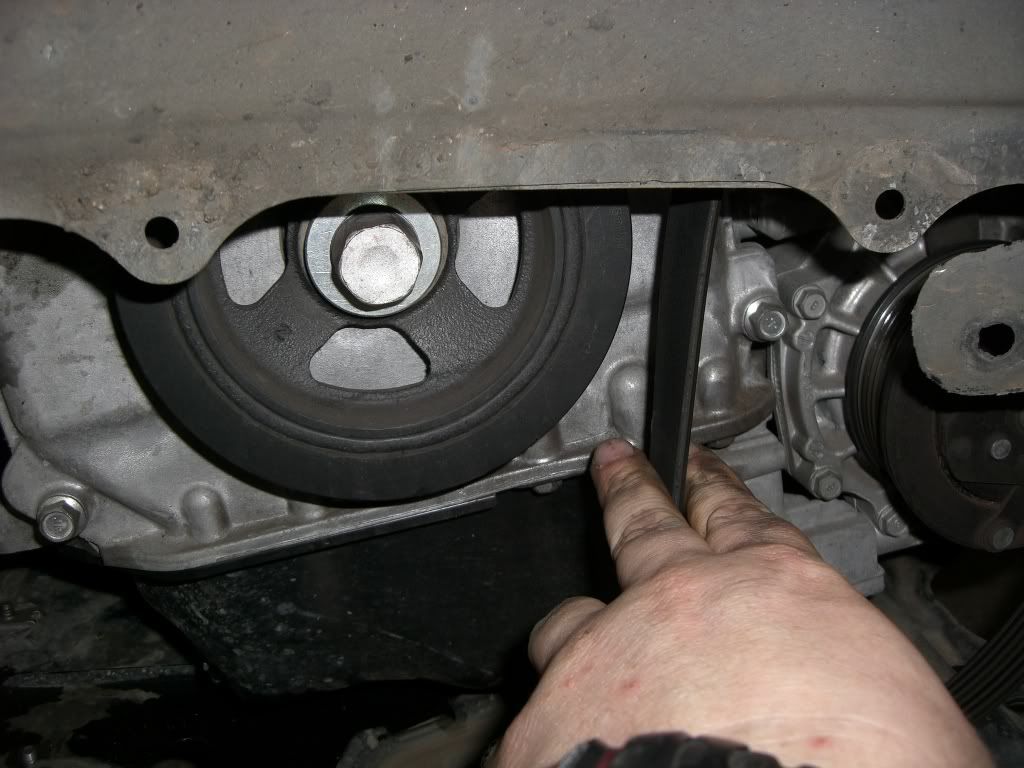
Leave the belt hanging to the right of the pulley and get your 22mm socket and extension bar (if required) and put it onto your heavy-duty impact driver gun). Set to maximum torque and reverse (anti-clockwise).
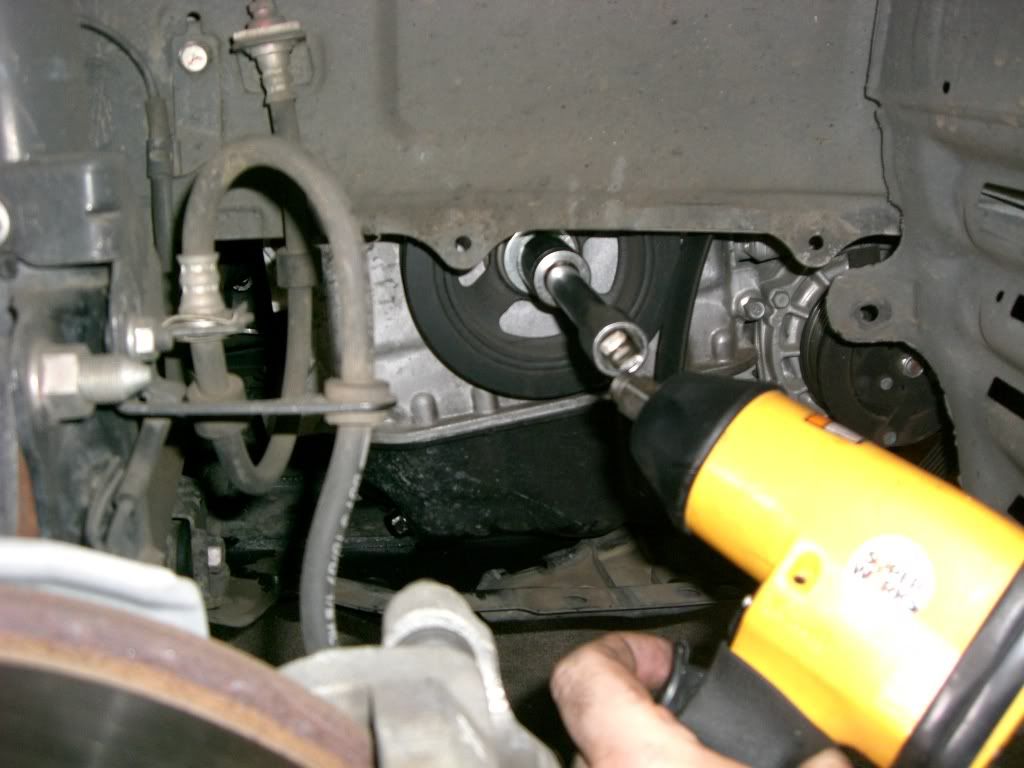
Once the centre bolt and washer comes away, remove the pulley.
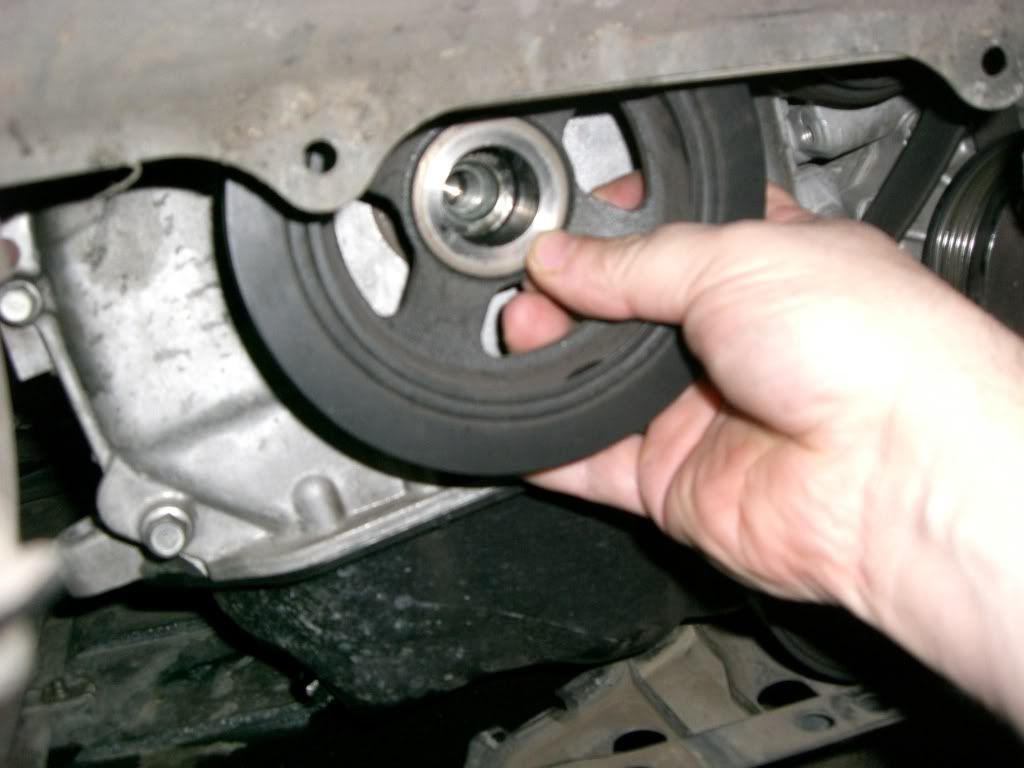
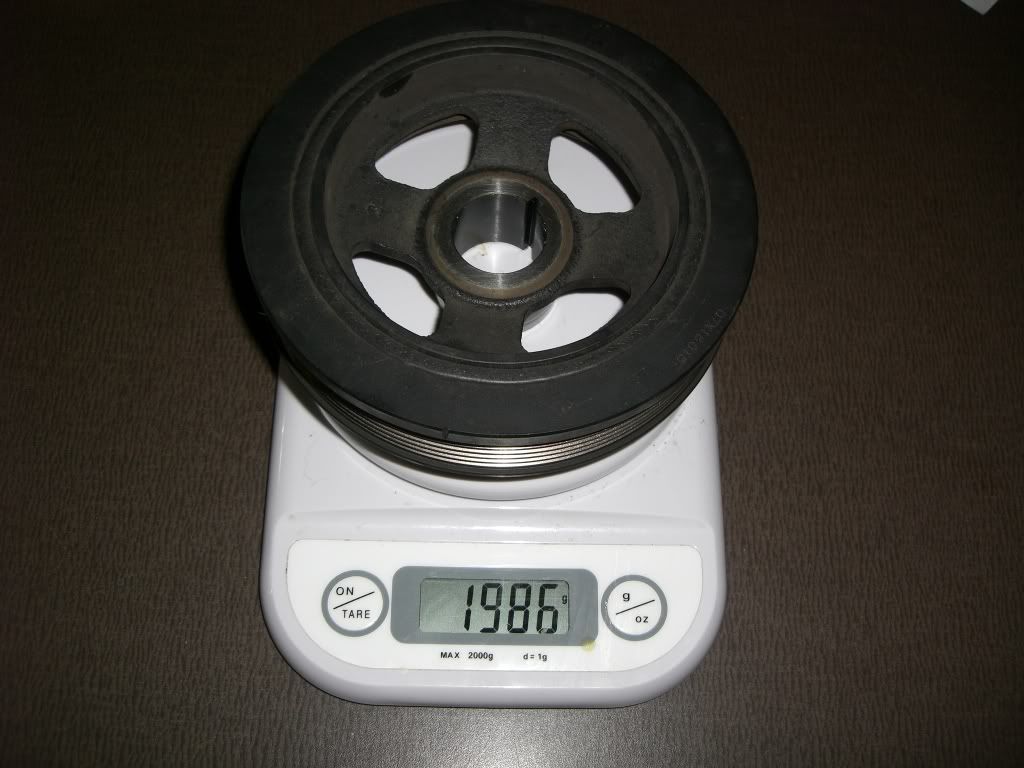
The pulley is more than double the weight of the lightweight Alutec product. Here is the OEM pulley, nearly 2kg.
From here its just a reversal, pay attention to the replacement of the snaking belt. Ensure its in all the grooves and not lapping over the edge of the pulleys or tensioners.
Replace the guard, replace the wheel and finger-tighten the wheel nuts. Remove the jack-stand and lower slightly until your car touches the floor slightly. Tighten the wheel nuts using a star-pattern, to correct torque.
Start the vehicle and check the belt operation. When satisfied, take the car for a test drive and enjoy!
The only downside is that the Alutec does not have the bonded-rubber vibration reduction banding, which sits between the inner part of the pulley and the face, on the OEM. Some say this can lead to a more rapid deterioration of crank bearings etc... I cannot say if this is the case, but many people run these in both cars and bikes. Time will tell.
But, this is a pure DIY, not an engineering discussion.
If you intend changing out your pulley, on your own, its very, very easy, with the right tools at hand. You will need; a 21mm and 22mm socket, a 16mm spanner (open or ring but the longer the better), a flat-bladed screwdriver, a jack, a jack-stand and most importantly, access to a powerful air impact wrench. I have one that has 600nm of torque and even that struggled on my max 110psi... So be warned.
If you do have access to all these tools, you can expect it to only take 10 mins.
First raise the car and place the stand under. The car should sit on both the stand and the jack for maximum protection. Use your impact driver to remove your wheel nuts and remove the wheel. Place under the car also.
(notice tasty 26mm Whiteline Sway, yum!)
Once you have this up, and your safety is assured, identify and remove the inner plastic guard.There are about 9 pull-centre clips to remove, use your flat blade to lever gently until the head is raised, then remove. The guard is inner front.
You can then pull away the guard to expose the pulley.
Now you have to grab your 16mm ring or open spanner and place it on the tensioner, which is above and slight to the right of the pulley.
You lever this toward the front of the car, so the tension is taken off the belt... you can lift the belt off the drive pulley (the big lower one, the one you are replacing).
Leave the belt hanging to the right of the pulley and get your 22mm socket and extension bar (if required) and put it onto your heavy-duty impact driver gun). Set to maximum torque and reverse (anti-clockwise).
Once the centre bolt and washer comes away, remove the pulley.
The pulley is more than double the weight of the lightweight Alutec product. Here is the OEM pulley, nearly 2kg.
From here its just a reversal, pay attention to the replacement of the snaking belt. Ensure its in all the grooves and not lapping over the edge of the pulleys or tensioners.
Replace the guard, replace the wheel and finger-tighten the wheel nuts. Remove the jack-stand and lower slightly until your car touches the floor slightly. Tighten the wheel nuts using a star-pattern, to correct torque.
Start the vehicle and check the belt operation. When satisfied, take the car for a test drive and enjoy!

