mike92
New Member
So going to pump out my first DIY. I had previously replaced my dash lights with direct replacement leds that screw right in. i had found these to be too dull so ive decided to also put in led strips. For my dash/cluster/stereo/aircon dials ive gone all blue leds.
The rest of my build can be found here: viewtopic.php?f=23&t=6048
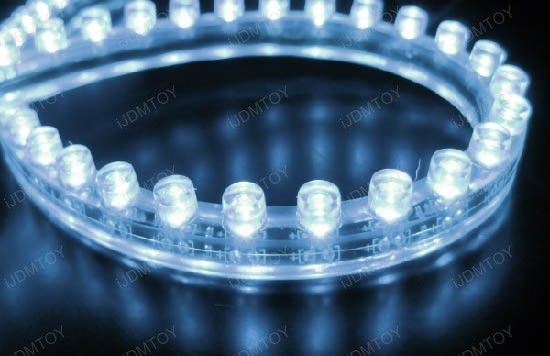
For the led strips. there is a few different styles, ive gone with the sort shown in the pic below because they bend easiest in such a way that u can bend it into curves...whilst keeping all the leds pointing in the same direction. Other styles often bend easier in the other direction ie. wrap it in a spiral around a tube with all leds pointing outward from that spiral... if that makes sense. It will make sense when you see it installed. :geek:
Since i did solder the wires in on this one, i assume you have some basic electrical knowledge, otherwise theres plenty of diy's covering that stuff.
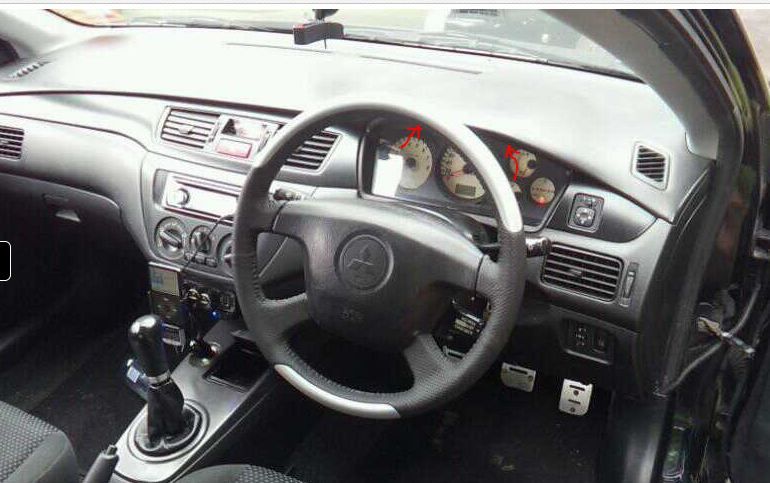
First, remove the black surround from infront of the cluster, there are two screws on the top underside at the arrows. Once they are out, that surround pulls out quite easily, it may help to drop the steering wheel height release down first:
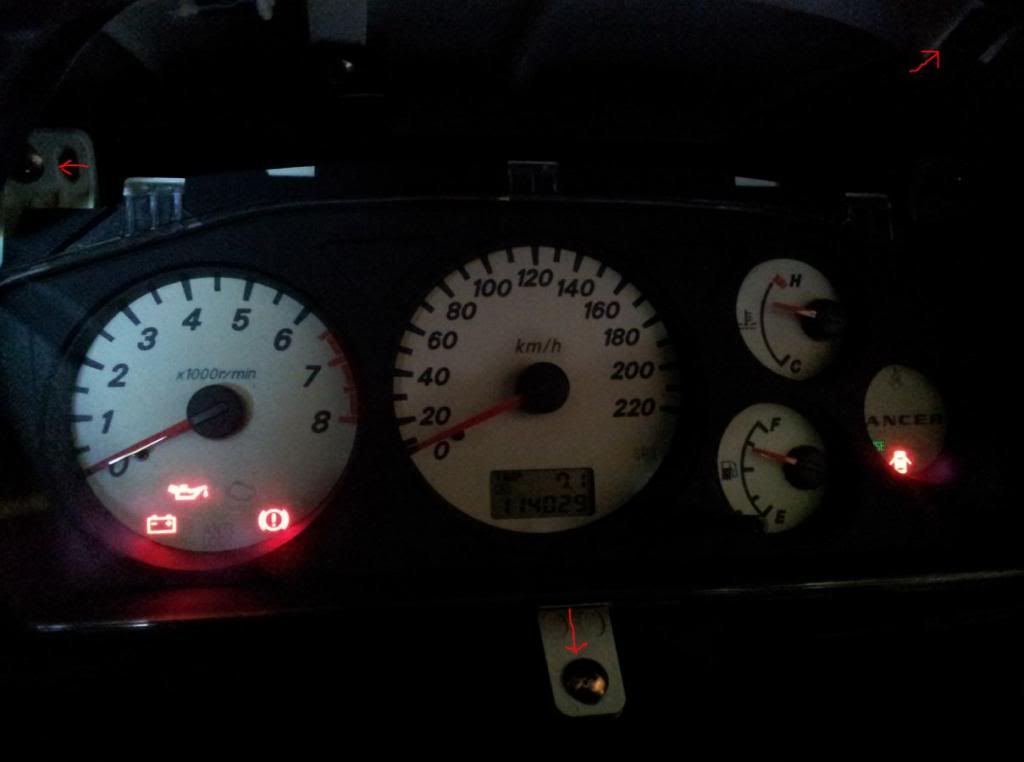
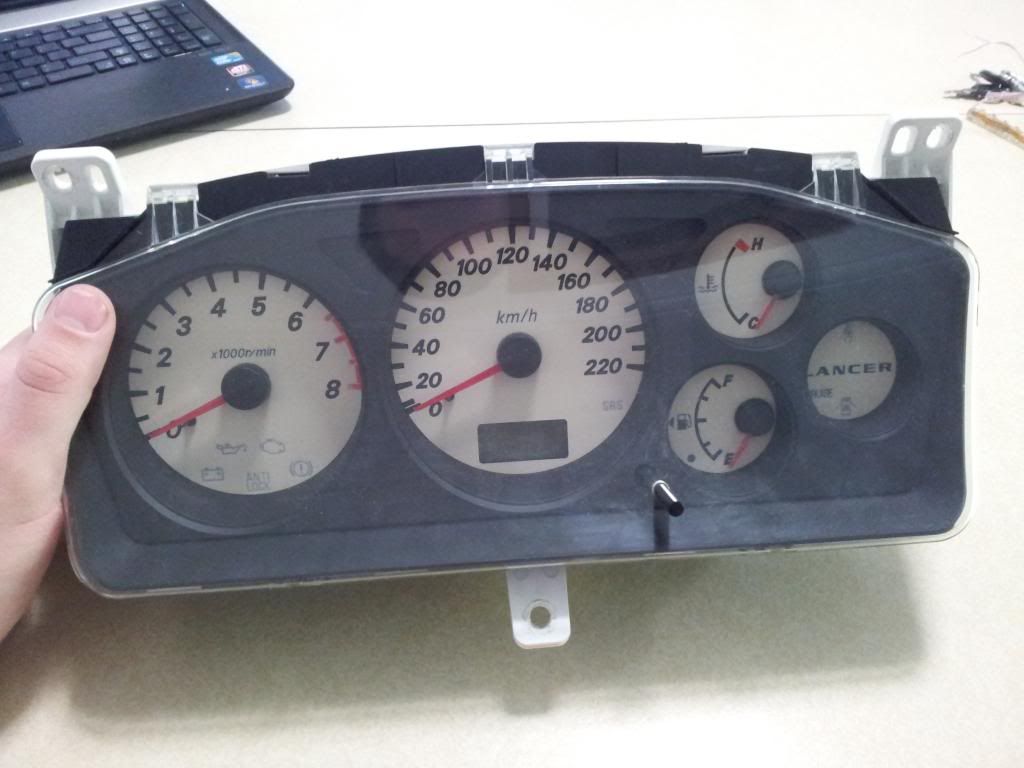
Next, there are 3 screws that hold the actual cluster unit to the dash. Once they are out, you can rotate the whole cluster out of its cavity, but it takes quite some wiggling/tactical rotating + a little force to get it out. Disconnect the two wiring plugs from the back:
Now that the cluster is out, if you simply want to replace the existing bulbs with Leds, or replace any blown instrument bulbs, you simply twist the old ones out and swap the new ones in, the next photo shows the 4 that are the actual back lights. Being Leds remember that they are polarised, and dont light up if installed in reverse. Check that they are in the correct way by temporarily plugging the dash in to see if they light up. if the dont, take them out, rotate 180 and reinstall.
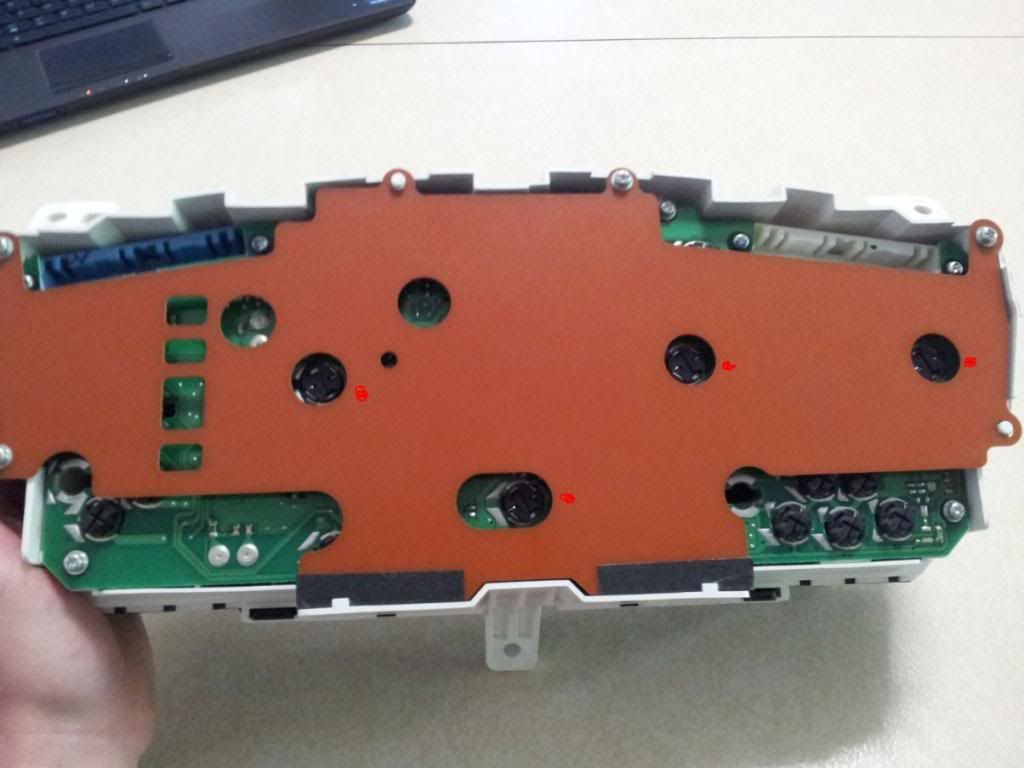
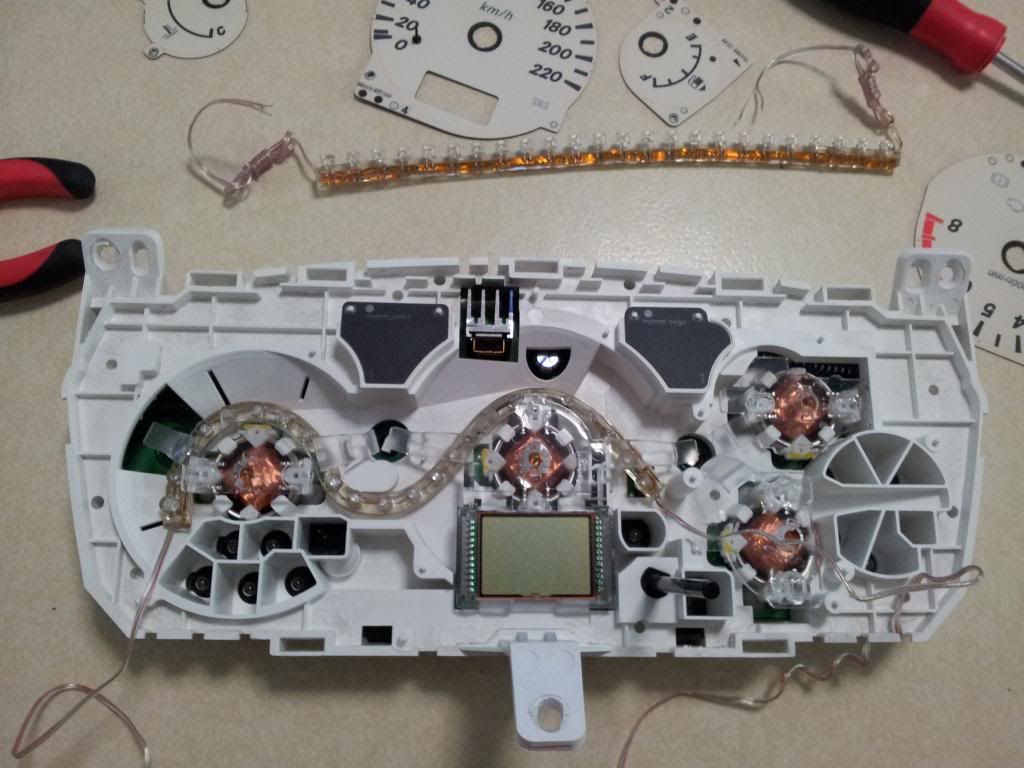
Now the topic of this DIY, If your a crazy kid like me and are doing led stips, flip the cluster over and you will first remove the clear shield by releasing the surrounding clips, then remove the black casing, which has the same style built in clips. ####WARNING#### This DIY does require you to remove the dials, which can result in them reading slightly different afterward. i recommend doing this on a full tank of fuel, and knowning where your engine temp normally sits after settling to its steady operating temperature, so you can install the dials more accuratly. For speed, mine was already reading about 7km faster then i was actually doing so after finishing the install, i went for a drive with the clear shield off, used gps to sit on 50, and put the dial back on at 50. Its now more accurate, but slightly ghetto :thumbup:
Once all the dials were off, i removed the plastic backing with speed and rpm print on them, now i was free to start wrapping my led strip in underneath the light spreading clear plastic tabs shown.
The good thing about these stips is that you can cut them to be shorter and they still work. The leds are wired in lots of three, so cut them in intervals of 3 from the end if needed. I used one full strip and one cut down to 9 leds as shown in the second pic.
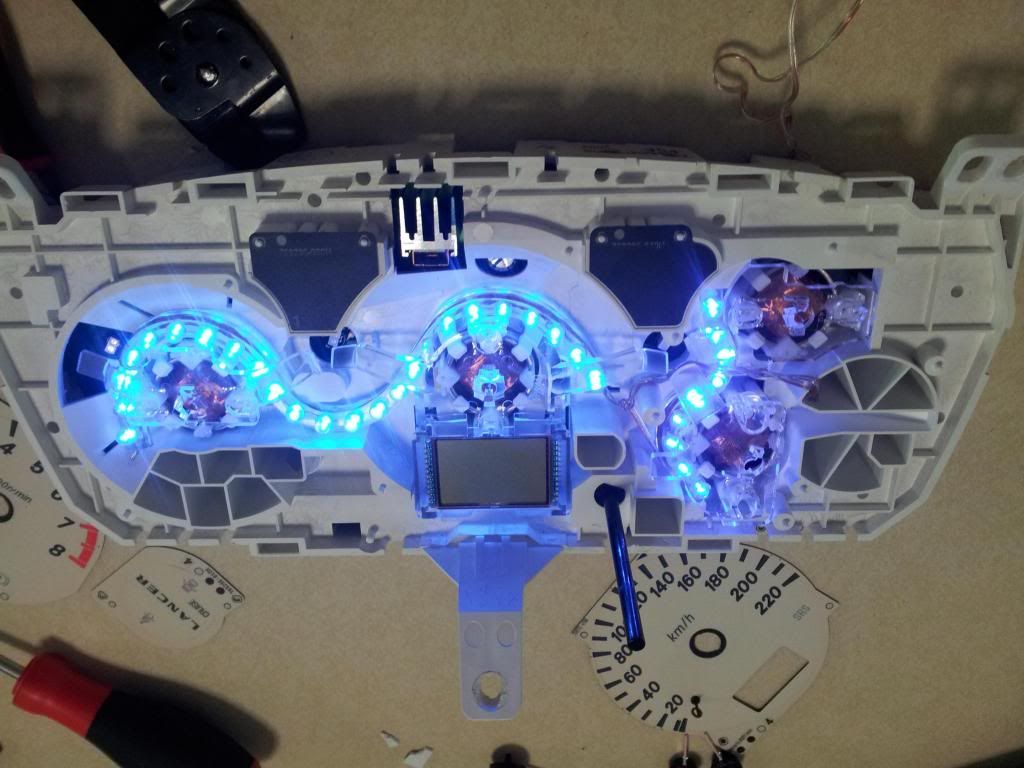
To power the strips, i routed the wires through a spare hole, i believe for the fog light indicator which i dont have, but there shud b a few ways to get the wires out the back side. I then soldered the two leads to one of the existing led backlights i had (or the stock ones metal contacts for a more permanent option.)in the picture, it was the black led butt to the right of the hole the wires are coming out of. Once again you may need to check the polarity to make sure it is wired correctly.
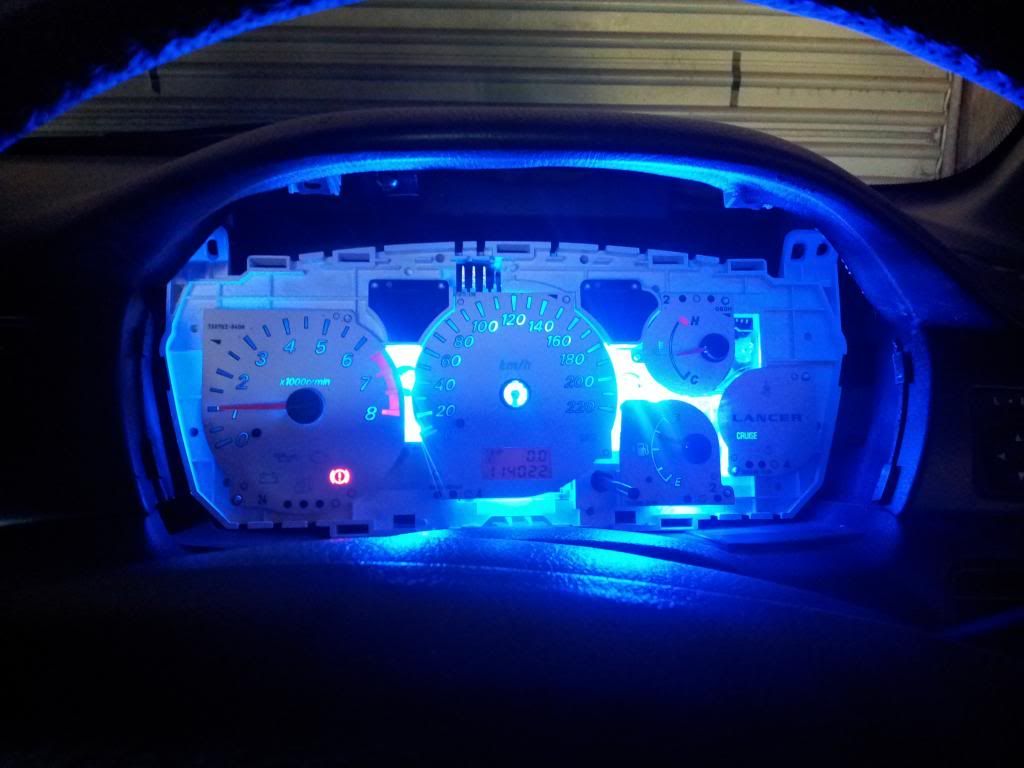
That is pretty much all, put it all back together except for the clear see through cover and the first black surround, go for a drive, get your dials right, then close it all up. This photo is the main cluster in, minus the covers so that i can do my speedo correctly.
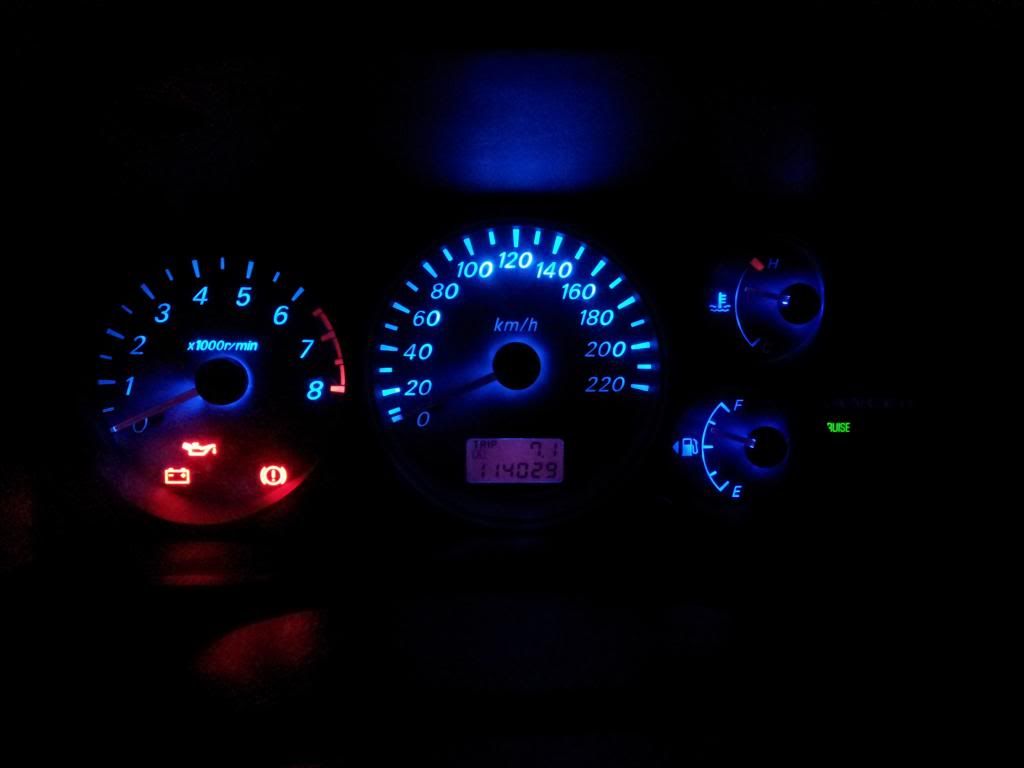
And the final restult:
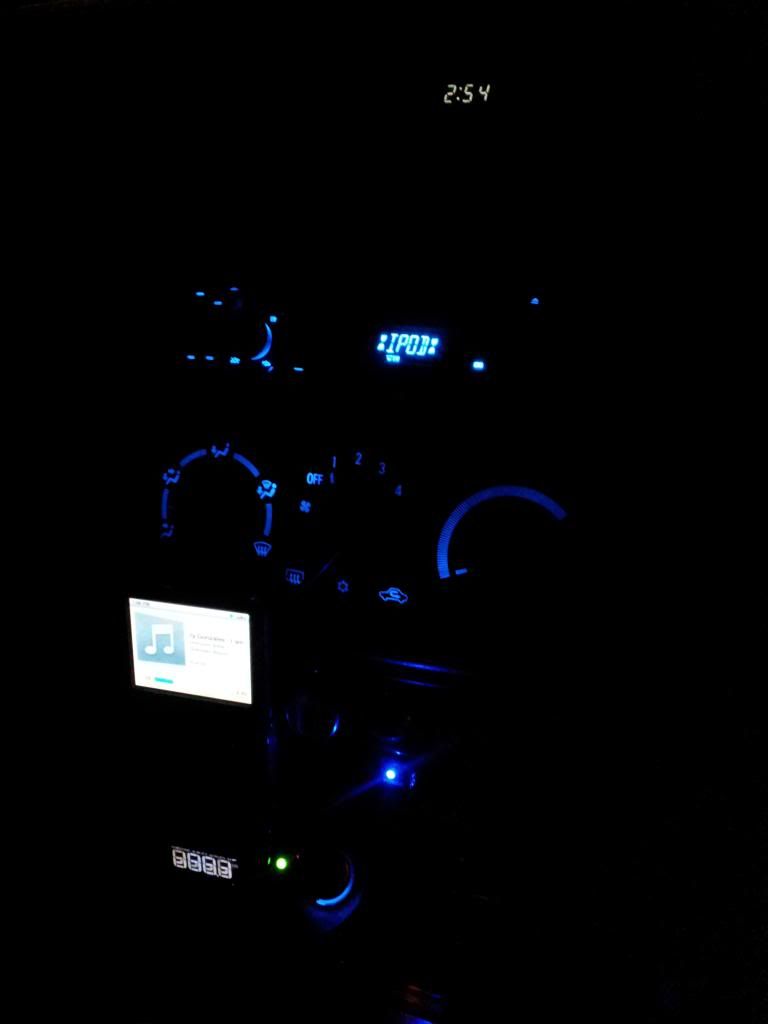
And my Center cluster:
Sweeeet. Cheers and hope this helps!
The rest of my build can be found here: viewtopic.php?f=23&t=6048
For the led strips. there is a few different styles, ive gone with the sort shown in the pic below because they bend easiest in such a way that u can bend it into curves...whilst keeping all the leds pointing in the same direction. Other styles often bend easier in the other direction ie. wrap it in a spiral around a tube with all leds pointing outward from that spiral... if that makes sense. It will make sense when you see it installed. :geek:
Since i did solder the wires in on this one, i assume you have some basic electrical knowledge, otherwise theres plenty of diy's covering that stuff.
First, remove the black surround from infront of the cluster, there are two screws on the top underside at the arrows. Once they are out, that surround pulls out quite easily, it may help to drop the steering wheel height release down first:
Next, there are 3 screws that hold the actual cluster unit to the dash. Once they are out, you can rotate the whole cluster out of its cavity, but it takes quite some wiggling/tactical rotating + a little force to get it out. Disconnect the two wiring plugs from the back:
Now that the cluster is out, if you simply want to replace the existing bulbs with Leds, or replace any blown instrument bulbs, you simply twist the old ones out and swap the new ones in, the next photo shows the 4 that are the actual back lights. Being Leds remember that they are polarised, and dont light up if installed in reverse. Check that they are in the correct way by temporarily plugging the dash in to see if they light up. if the dont, take them out, rotate 180 and reinstall.
Now the topic of this DIY, If your a crazy kid like me and are doing led stips, flip the cluster over and you will first remove the clear shield by releasing the surrounding clips, then remove the black casing, which has the same style built in clips. ####WARNING#### This DIY does require you to remove the dials, which can result in them reading slightly different afterward. i recommend doing this on a full tank of fuel, and knowning where your engine temp normally sits after settling to its steady operating temperature, so you can install the dials more accuratly. For speed, mine was already reading about 7km faster then i was actually doing so after finishing the install, i went for a drive with the clear shield off, used gps to sit on 50, and put the dial back on at 50. Its now more accurate, but slightly ghetto :thumbup:
Once all the dials were off, i removed the plastic backing with speed and rpm print on them, now i was free to start wrapping my led strip in underneath the light spreading clear plastic tabs shown.
The good thing about these stips is that you can cut them to be shorter and they still work. The leds are wired in lots of three, so cut them in intervals of 3 from the end if needed. I used one full strip and one cut down to 9 leds as shown in the second pic.
To power the strips, i routed the wires through a spare hole, i believe for the fog light indicator which i dont have, but there shud b a few ways to get the wires out the back side. I then soldered the two leads to one of the existing led backlights i had (or the stock ones metal contacts for a more permanent option.)in the picture, it was the black led butt to the right of the hole the wires are coming out of. Once again you may need to check the polarity to make sure it is wired correctly.
That is pretty much all, put it all back together except for the clear see through cover and the first black surround, go for a drive, get your dials right, then close it all up.
This photo is the main cluster in, minus the covers so that i can do my speedo correctly.
And the final restult:
And my Center cluster:
Sweeeet. Cheers and hope this helps!