Jazza
Active Member
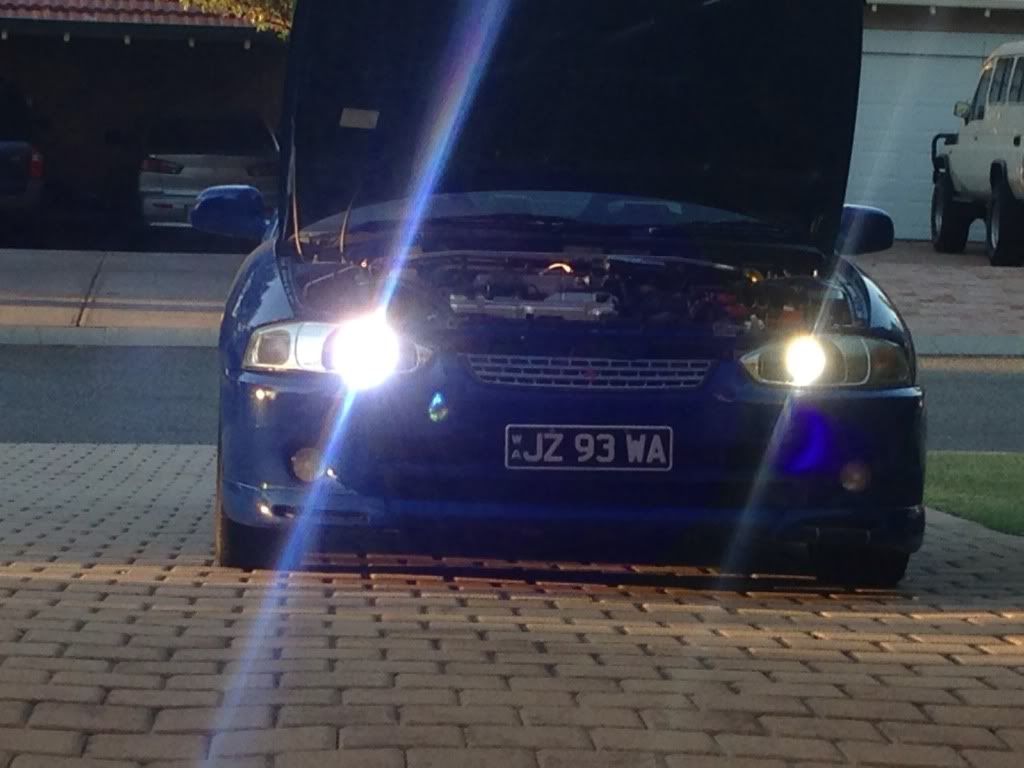
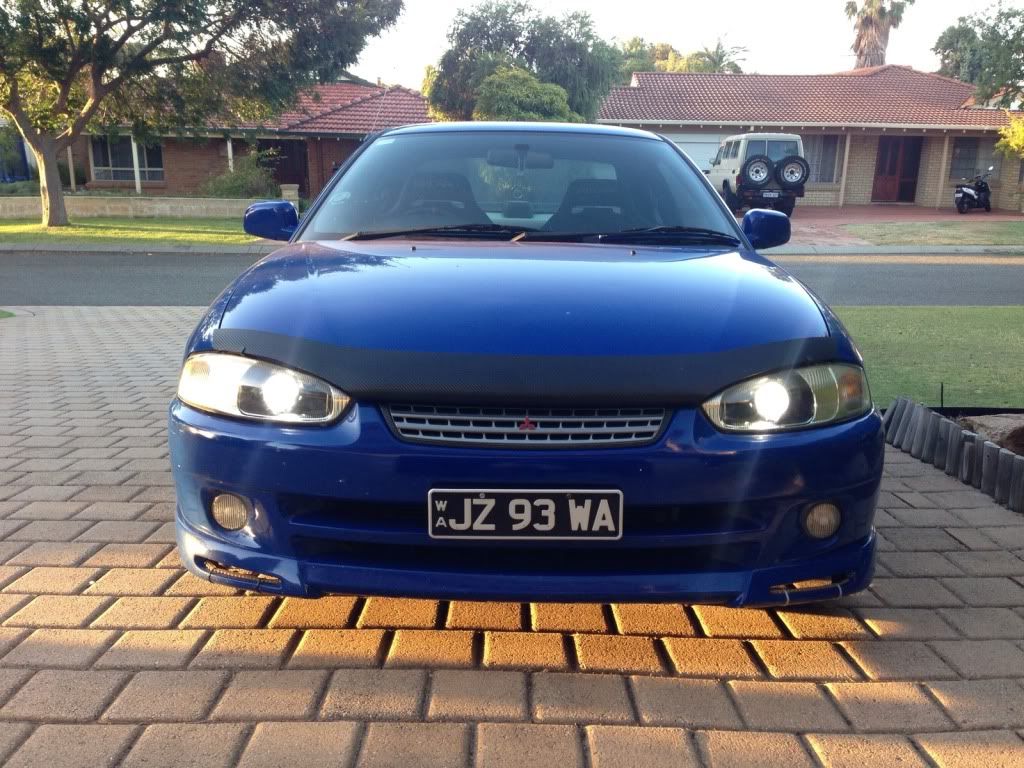
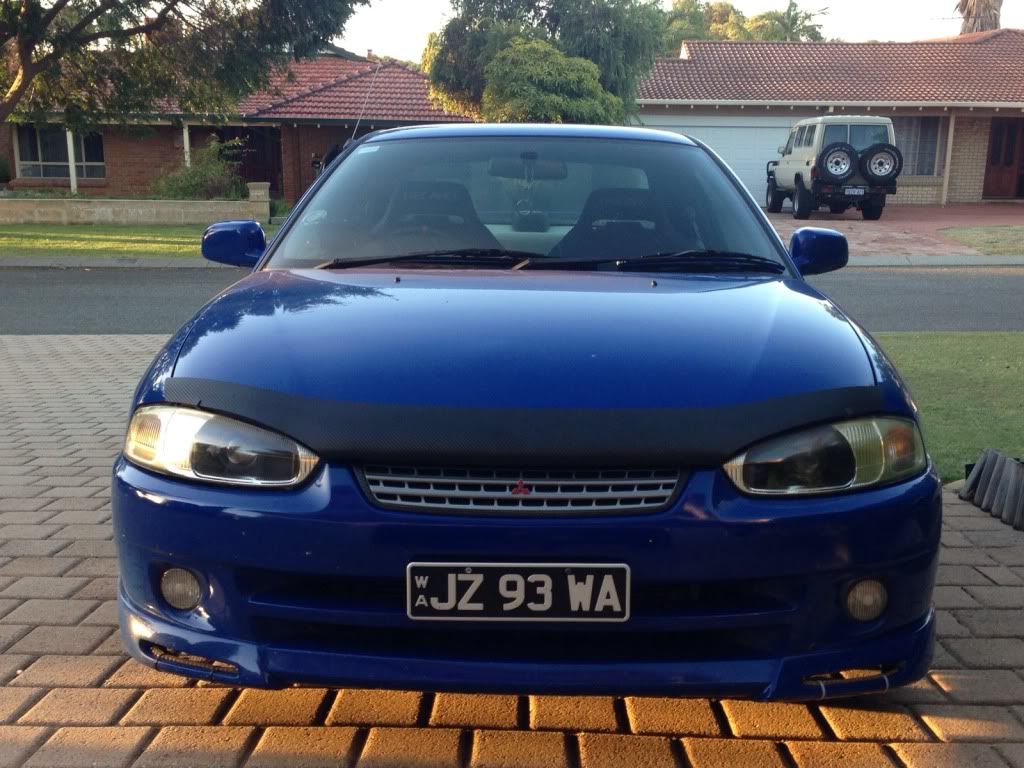
I'll do a DIY coz there isn't one for this yet and it's pretty easy to do. I think everyone should do it, MASSIVE difference over the stock headlights and it doesn't cost all that much. These headlights will match and even out do some european cars. (I was driving behind an audi and was lighting up the road in front of him more than he was lol)
Things you'll need.
- stock headlights
- Projector Kit (link below)
- Plastic primer and paint (optional, cost me $7 from supercheap auto)
- oven
- phillips and flat head screw drivers
You'll want to buy the Bi-Xenon Morimoto Mini Stage III Kit (H1) from The Retrofit Source (TRS) here...
https://www.theretrofitsource.com/produ ... cts_id=227
These are the options I selected.
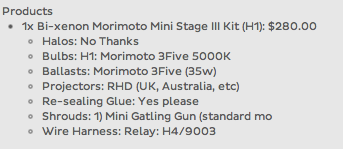
It was about $325 delivered with the 5% discount you get by entering a code you'll find on TRS's facebook page. I didn't need the re sealing glue so coulda saved 10 bucks there but I got it because I didn't know if I'd need it or not. I'm telling you now you won't need it, save your money.
Ok, on with the modding..
This is to open up your headlights.
Firstly, take out the main globe and indicator globes and plugs, the parkers plugs, rubber dust cover and metal globe holder clip. Clip comes out by loosening the screw holding it on.
Then undo these 2 screws.
(picture courtesy of Joshy_Morris, forgot to get one myself)
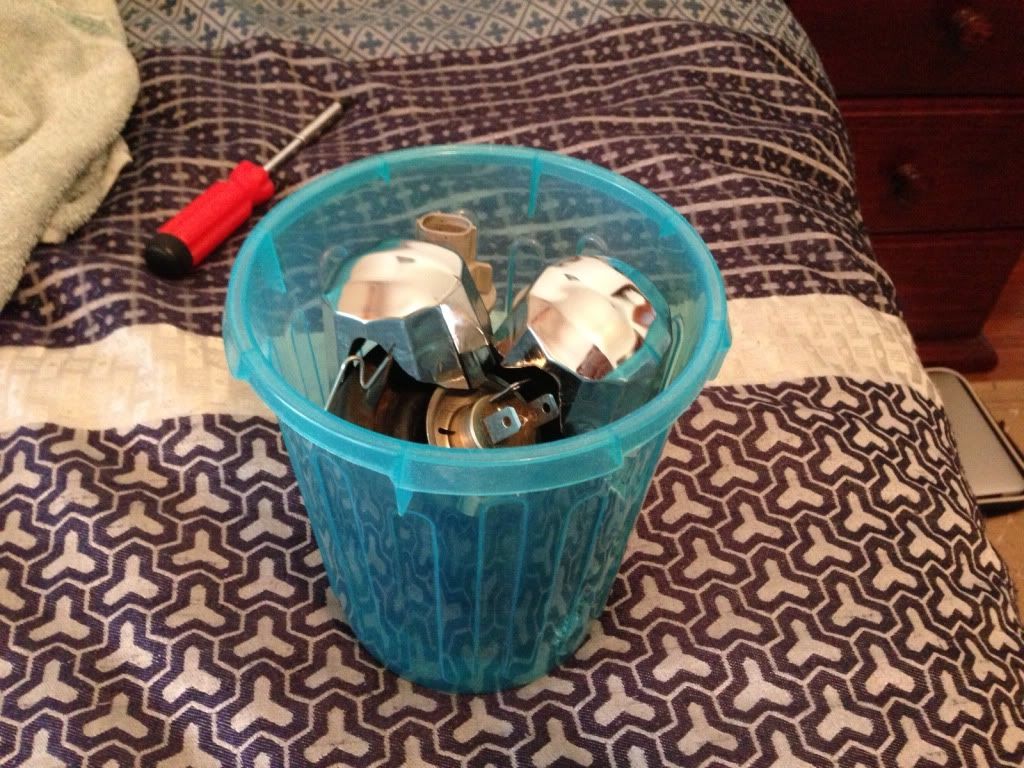
Place all the screws and plugs in a container so you don't loose them.
On the kitchen table, grab a towel for your headlight to sit on
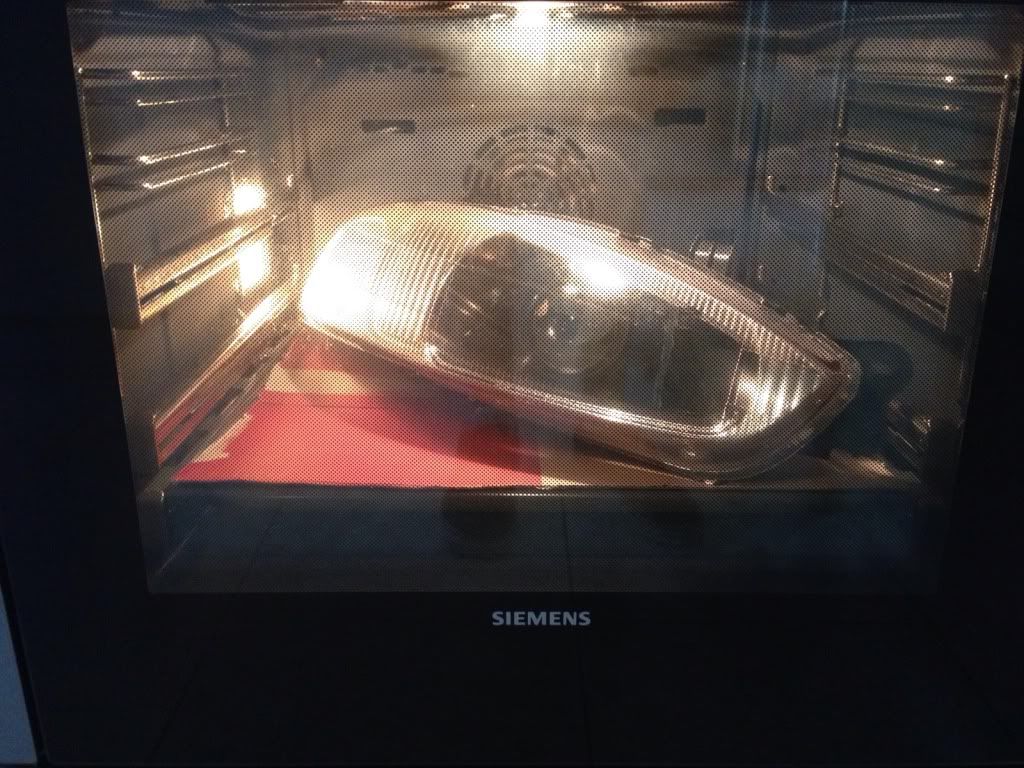
Preheat the oven to 130*C
Once preheated, place your headlight in on a piece of cardboard (not on bare metal) in the oven and let it cook for 7 minutes.
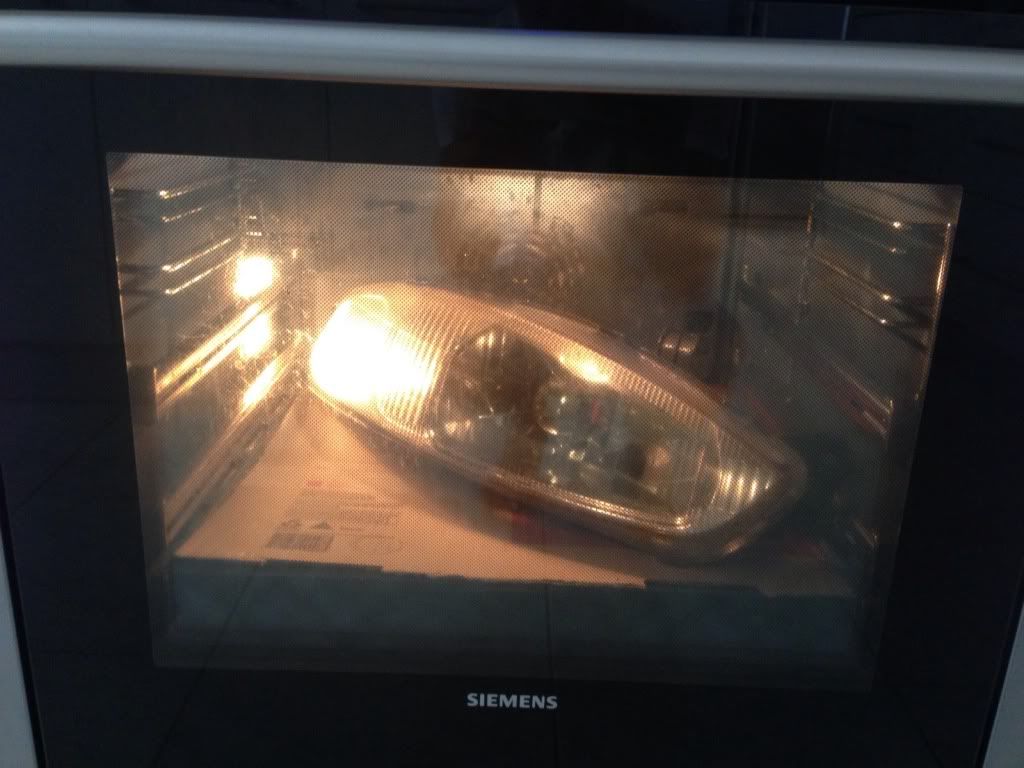
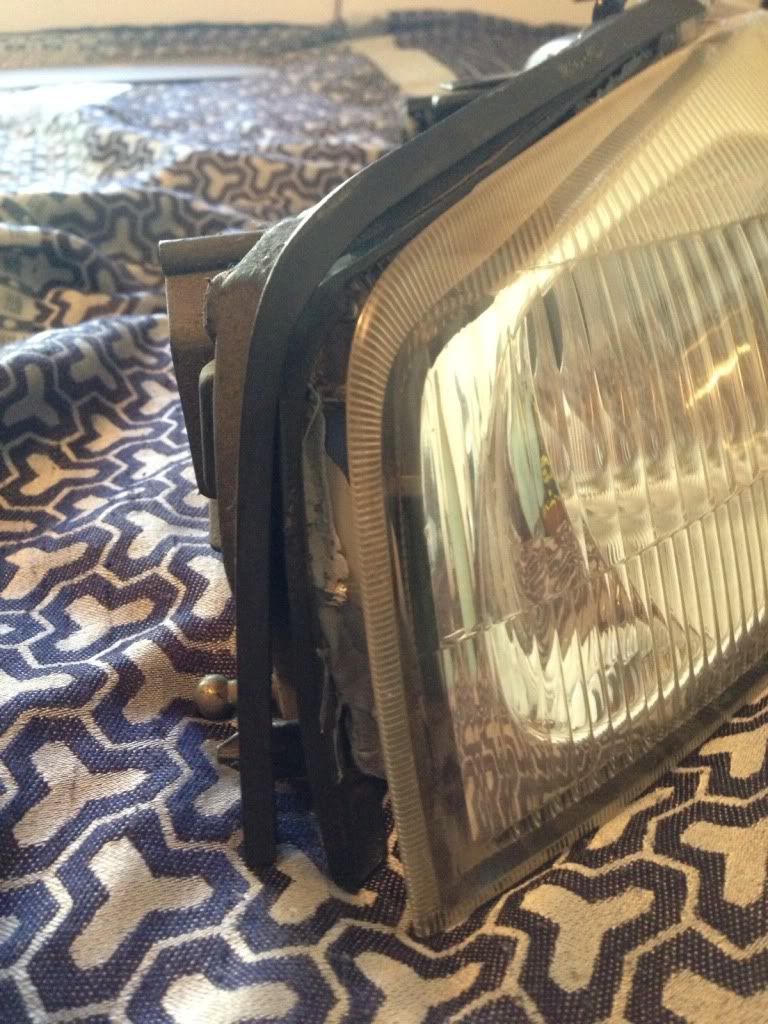
Take out your headlight with some oven mits lifting from the metal bracket, not the plastic one as it might bend a little, and get your flat head screw driver and pry gently at a corner. Once you can get your fingers in there, pull the lens off. It will take a bit of effort. Watch for the plastic clip parts that hold on the lens also.
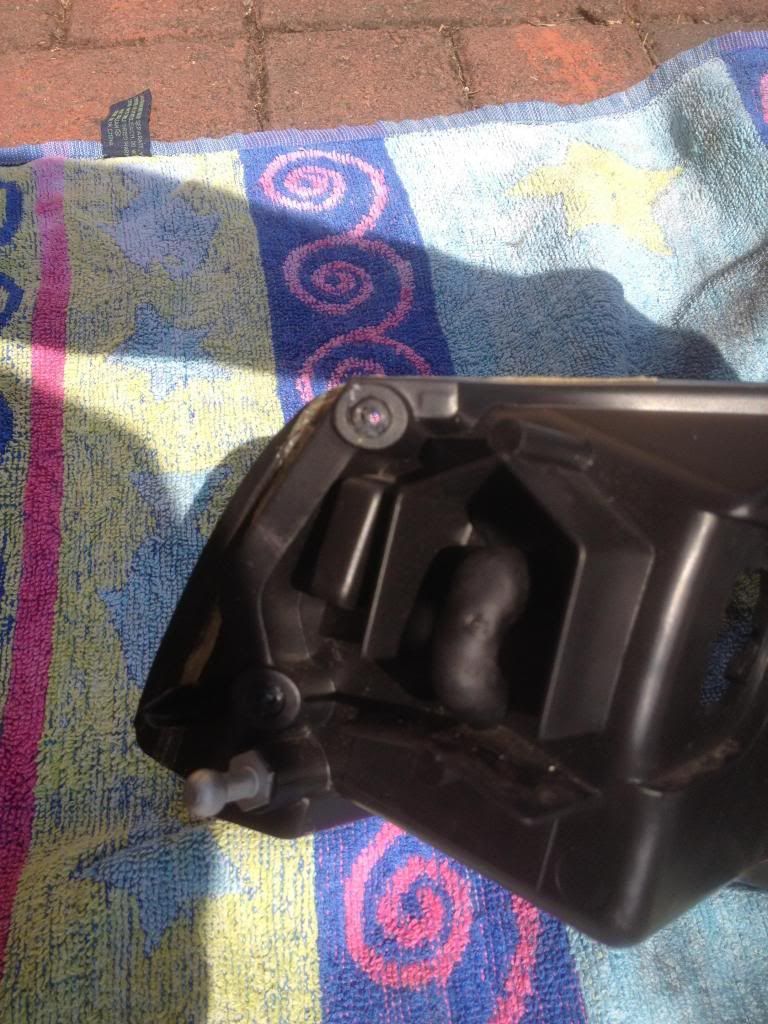
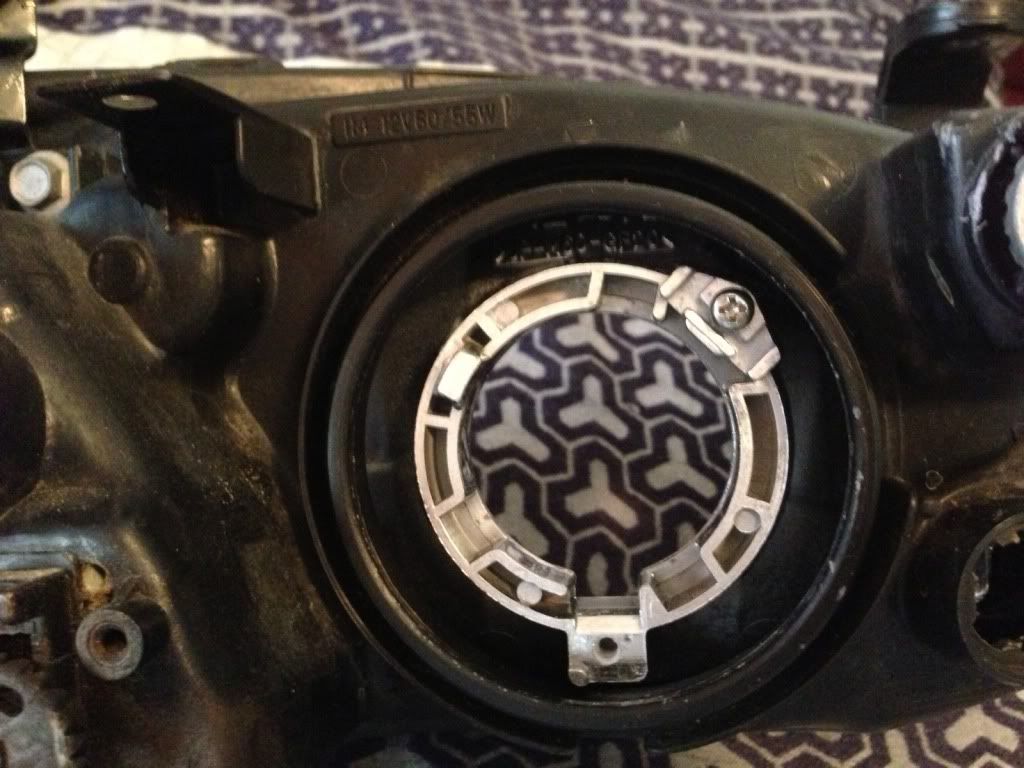
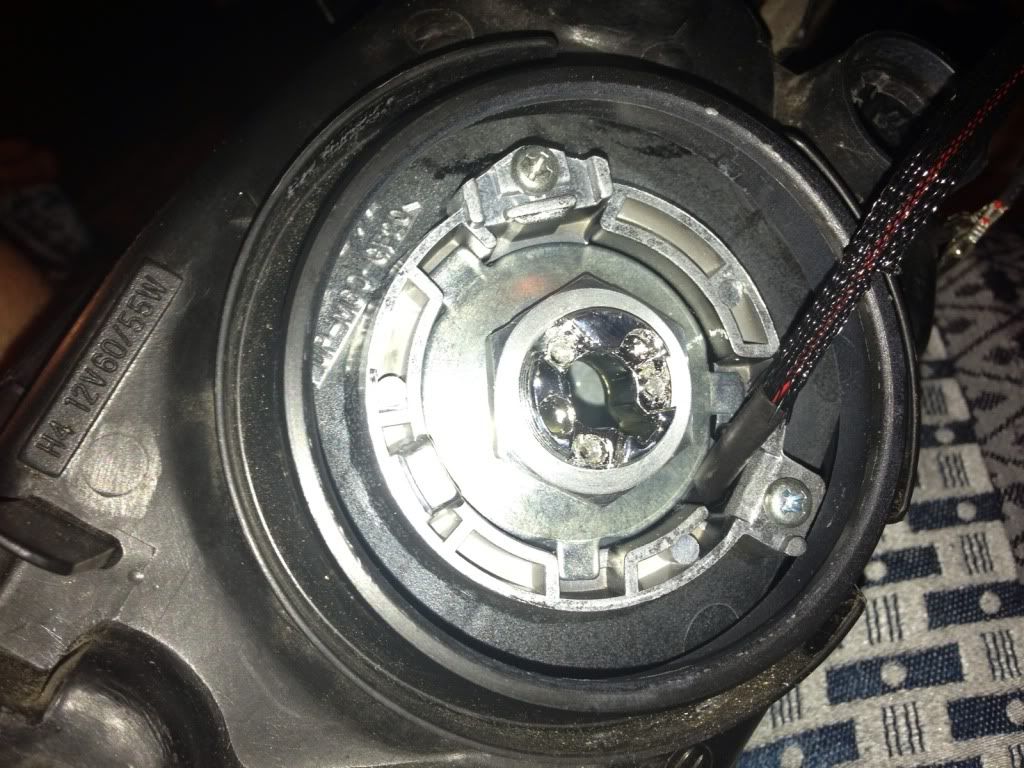
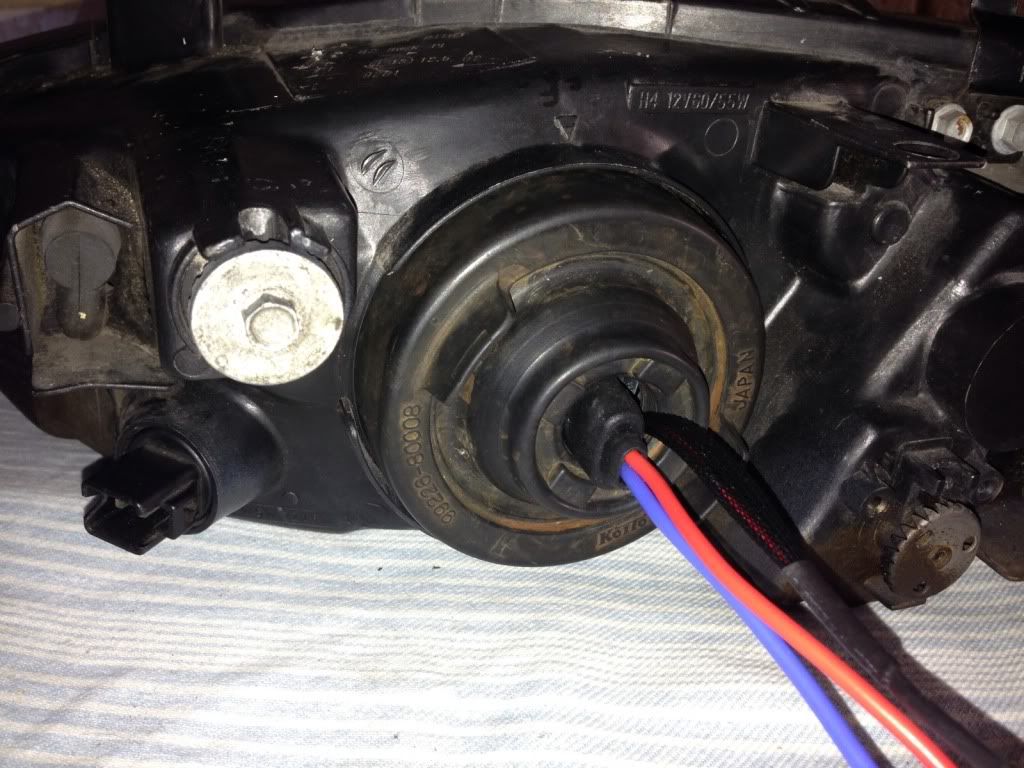
Now you have it opened, we need to undo the little reflector thingy. To remove, unscrew the bottom screw from behind the headlight here.
(picture shows screw already removed, you can still see the hole it was in)
You won't need these pieces anymore, but I still placed them in my container with all the other screws, globes and plugs.
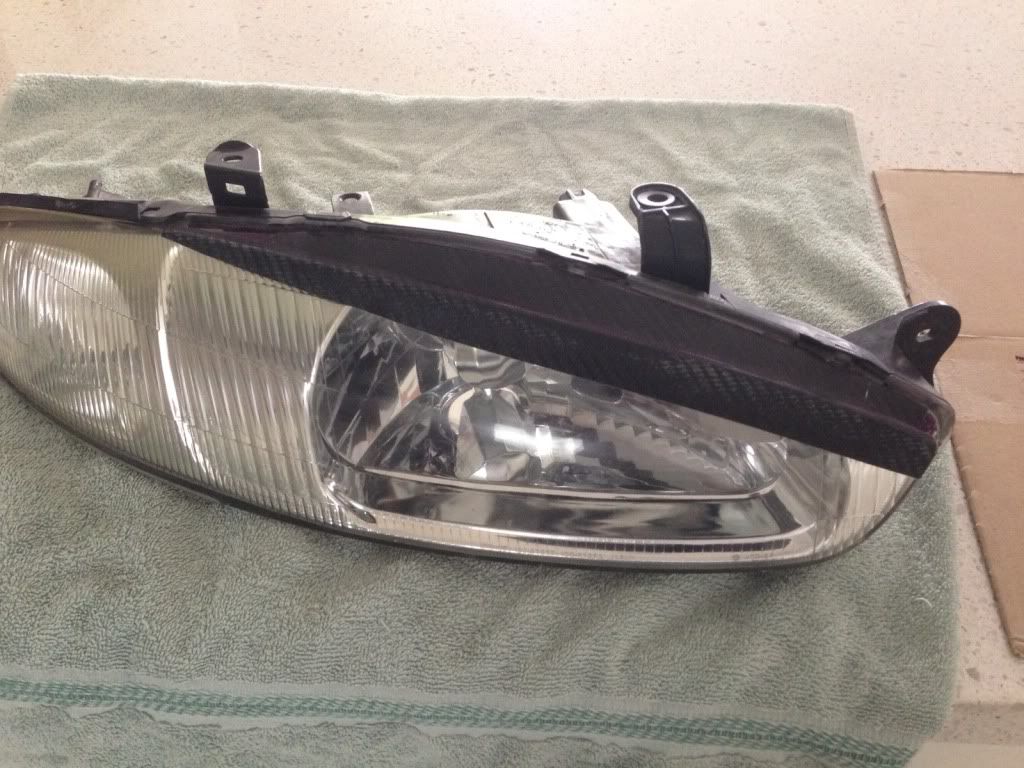
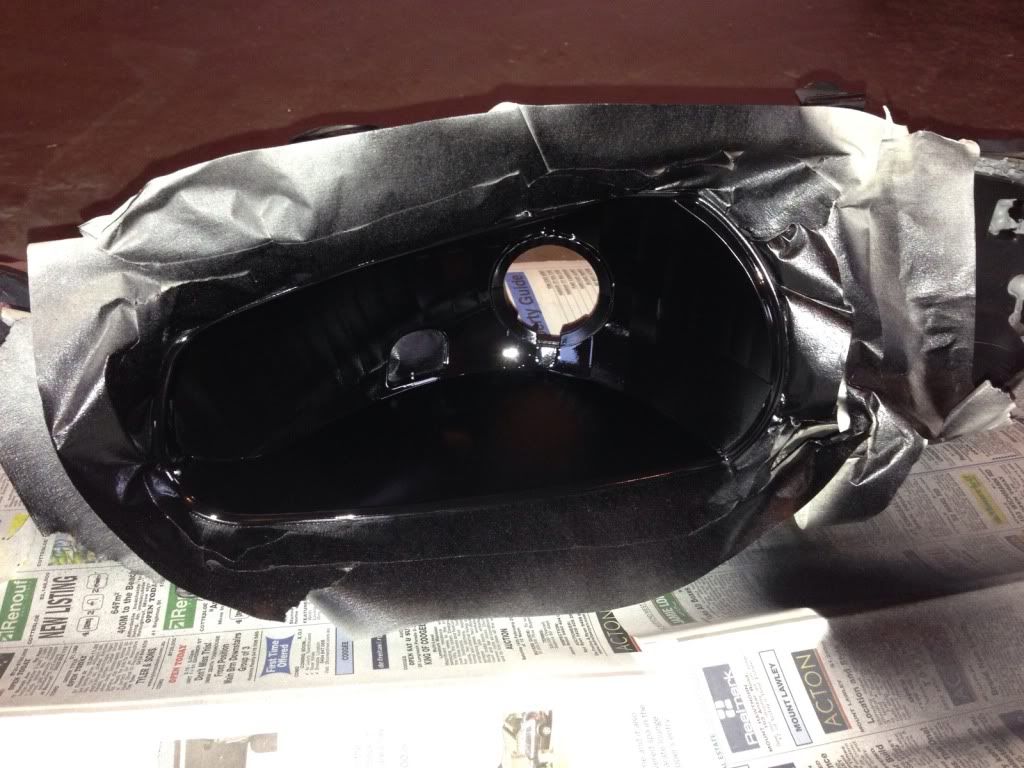
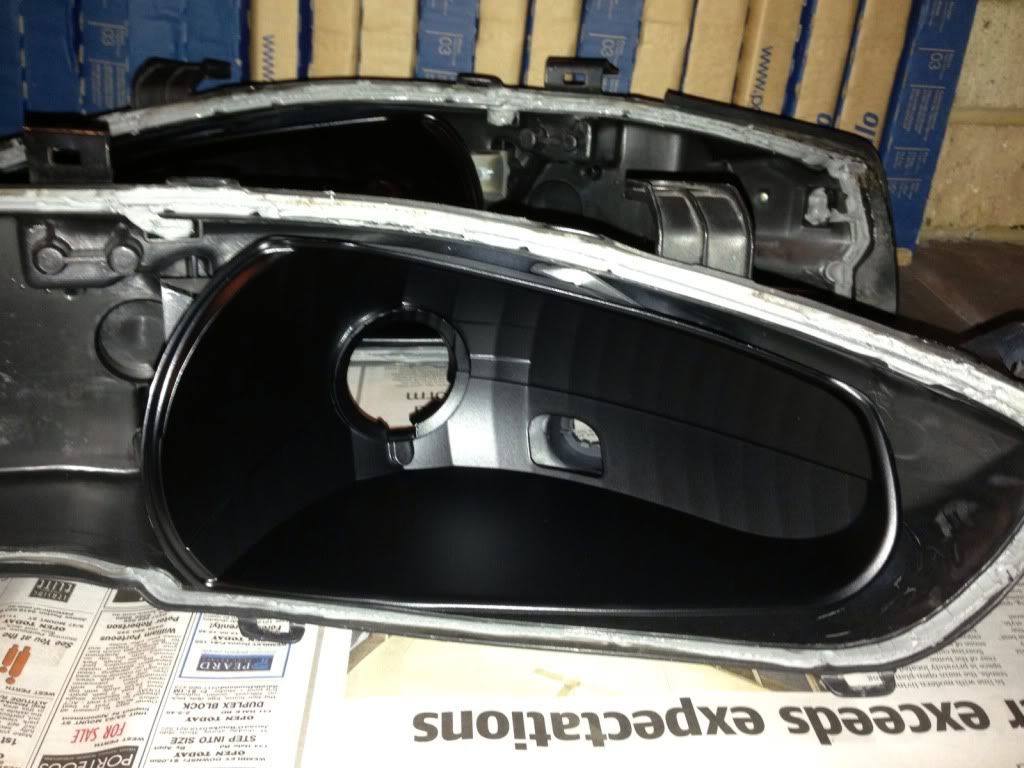
Finally you will have something looking like this!
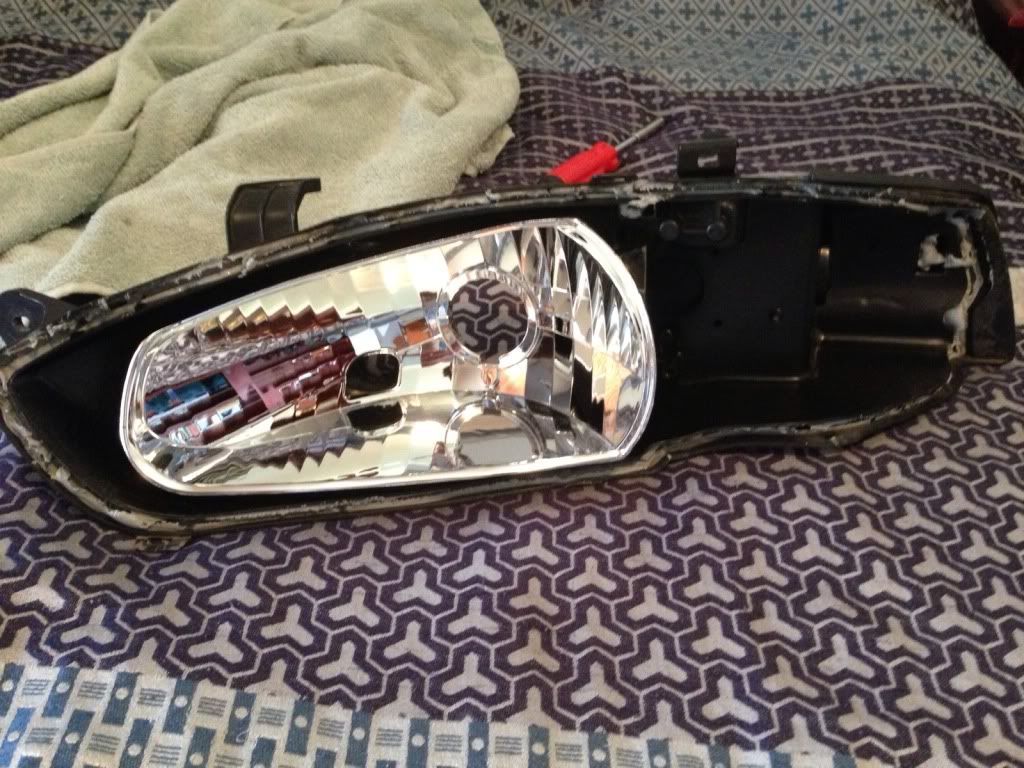
Now I painted the reflector and shroud. Paint whatever you want, or not at all.
Mask it all up and give 2 coats of primer, waiting 5 mins between the coats.
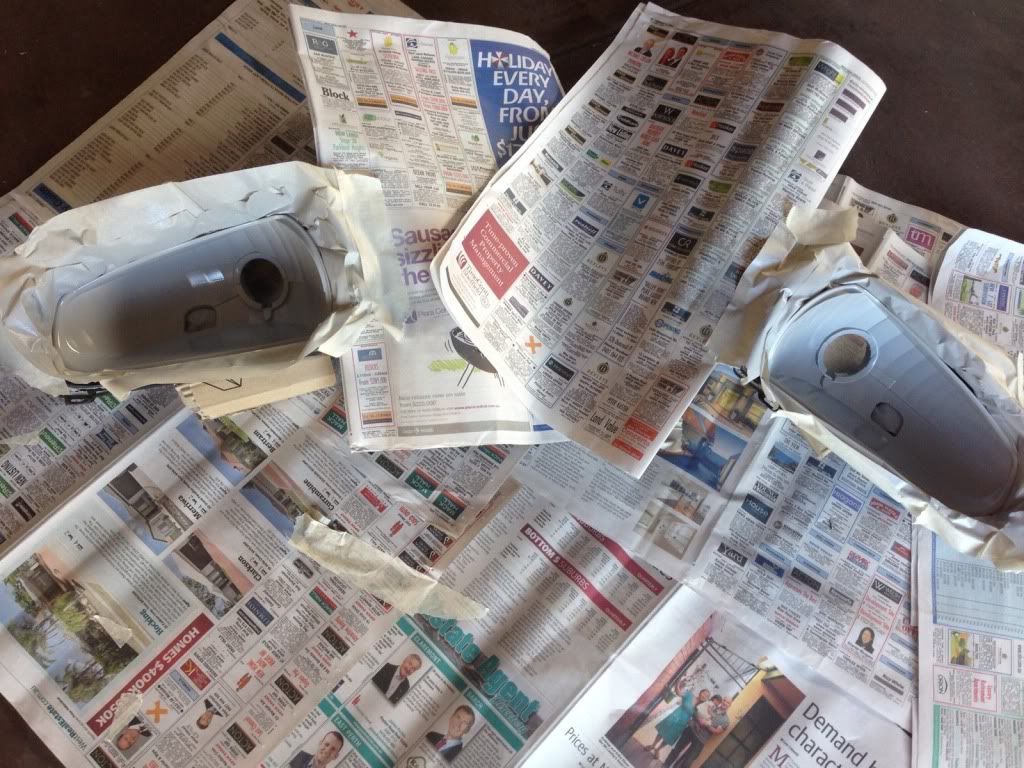

Then however many coats of paint you want. I sprayed 4 coats.
Now we're ready to fit in the projectors!
During this whole process, try your best not to touch the projector lens! Fingerprints are nasty.
Here is a link to a hardware installation guide I followed.
http://www.theretrofitsource.com/pdf/tr ... de_1-2.pdf
Take your projector out of the box. There will be a little zip lock bag in there too with clips screws and plates.
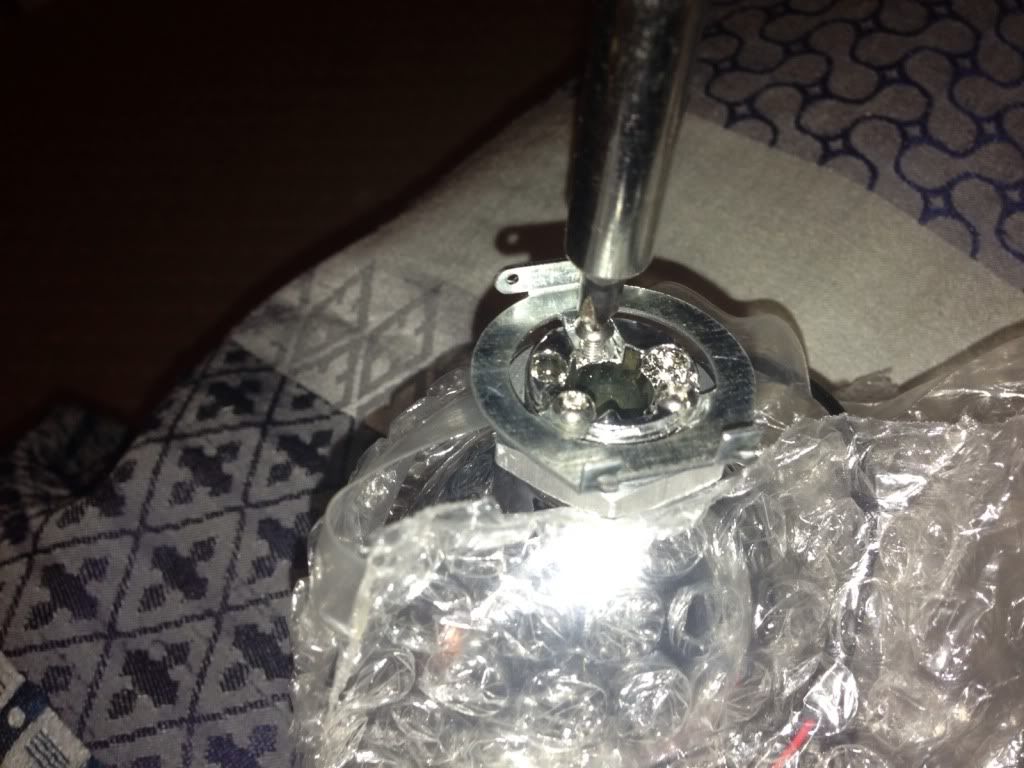
Firstly remove the bulb holder from the rear of the projector by removing these 3 screws. Mine were super duper tight and hard to get off, make sure you push as hard as you can when loosening.
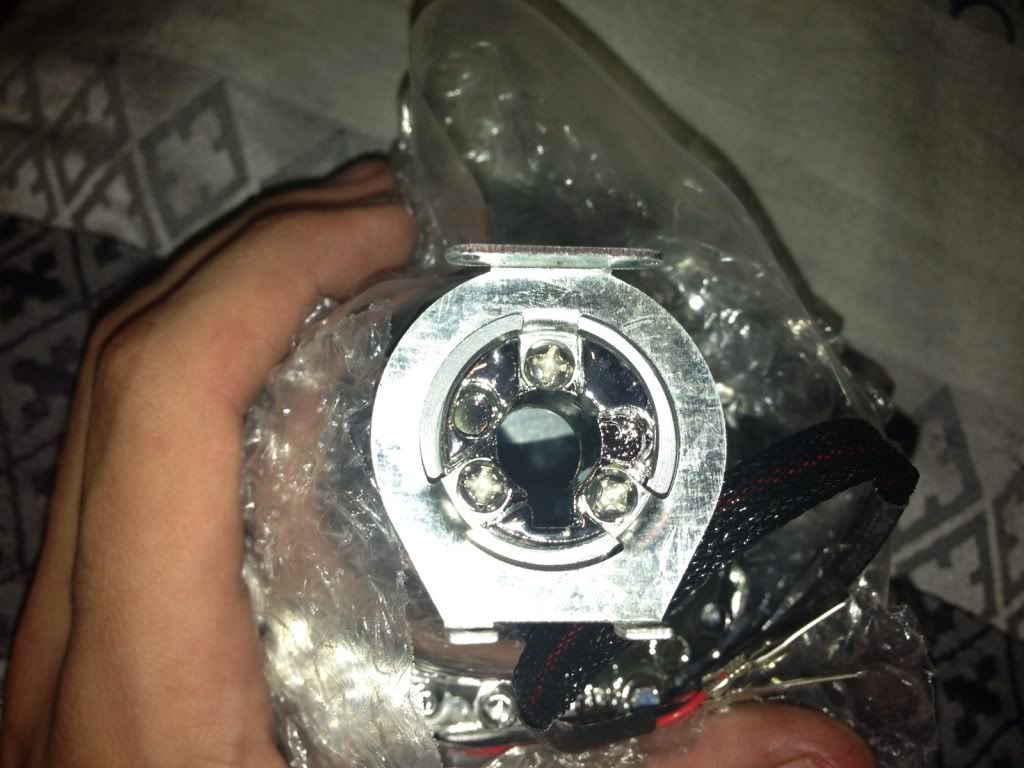
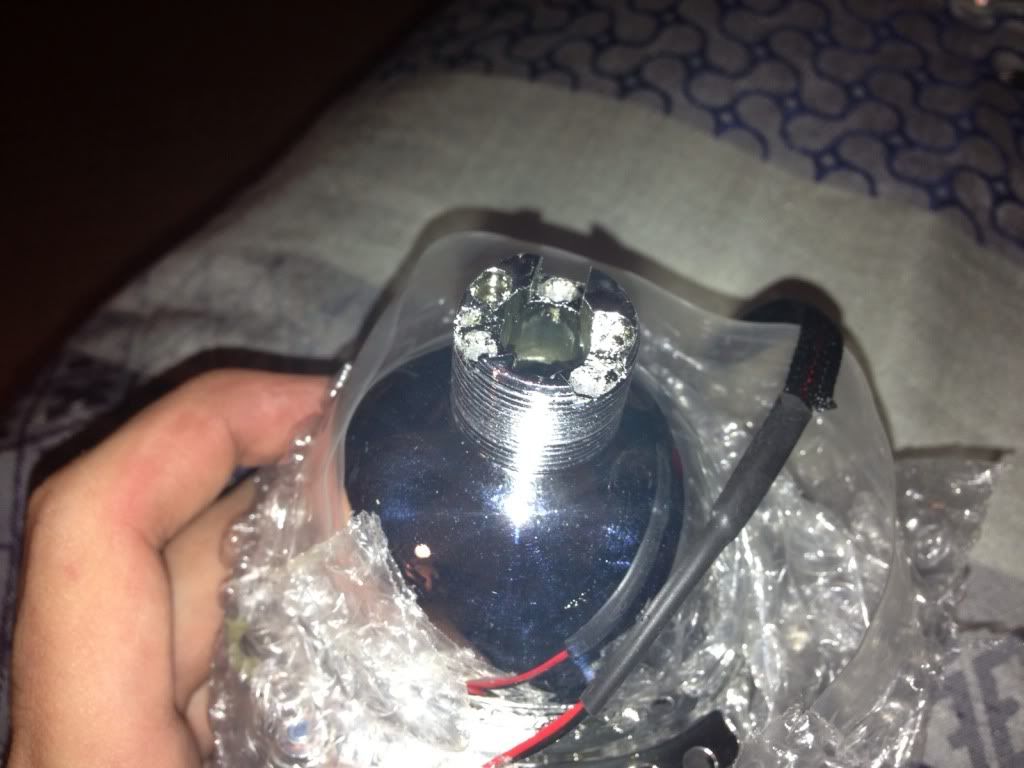
And you will end up with this.
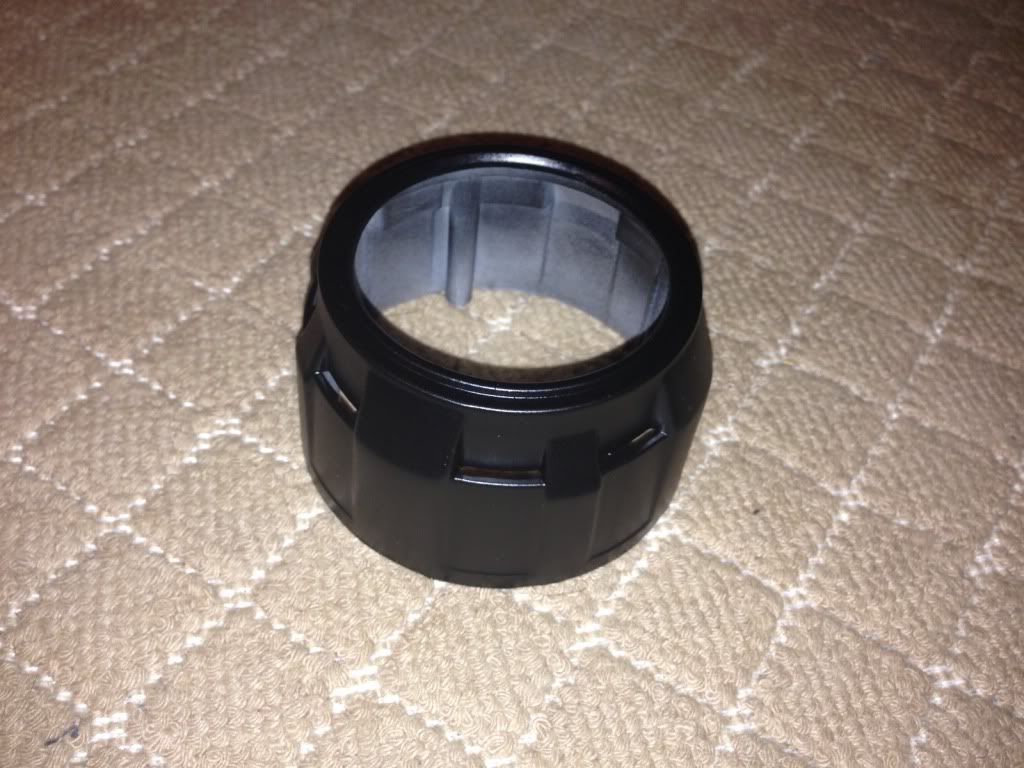
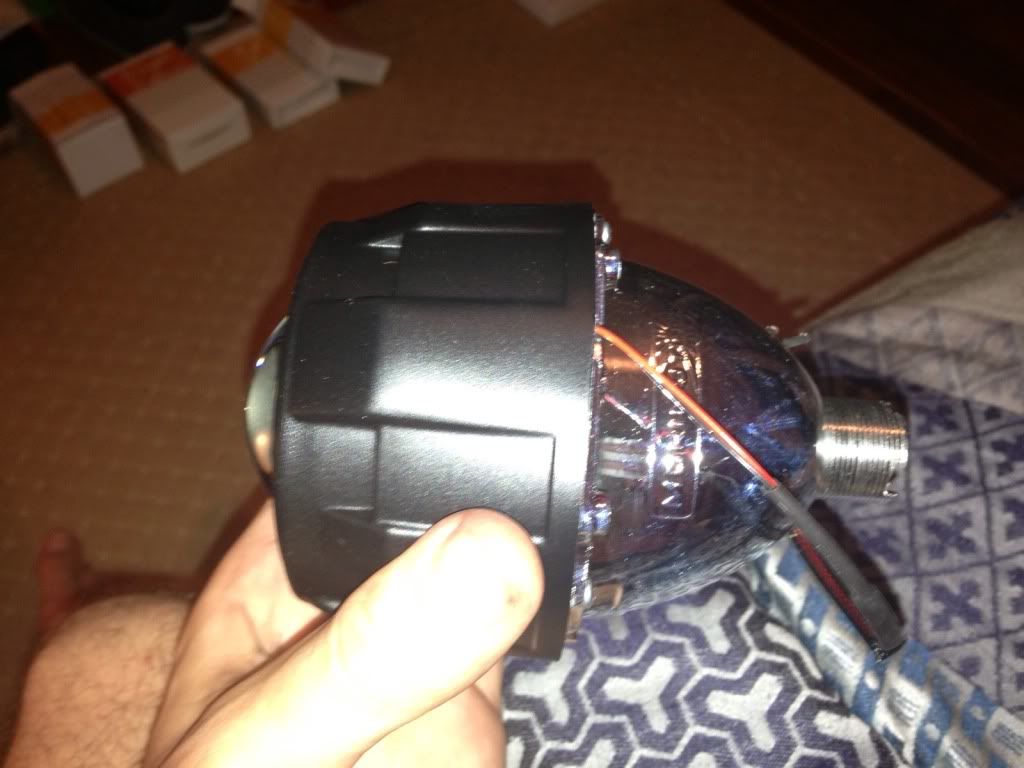
I purchased the mini gatling gun shroud so this is how you mount that one. I personally think it looks the best, nice and clean.
There should be 4 long screws in that mini zip lock bag, these are used to mount the shroud on the projector. Place the shroud over the projector and line up the holes. It only goes on one way so rotate until they line up, then screw in.
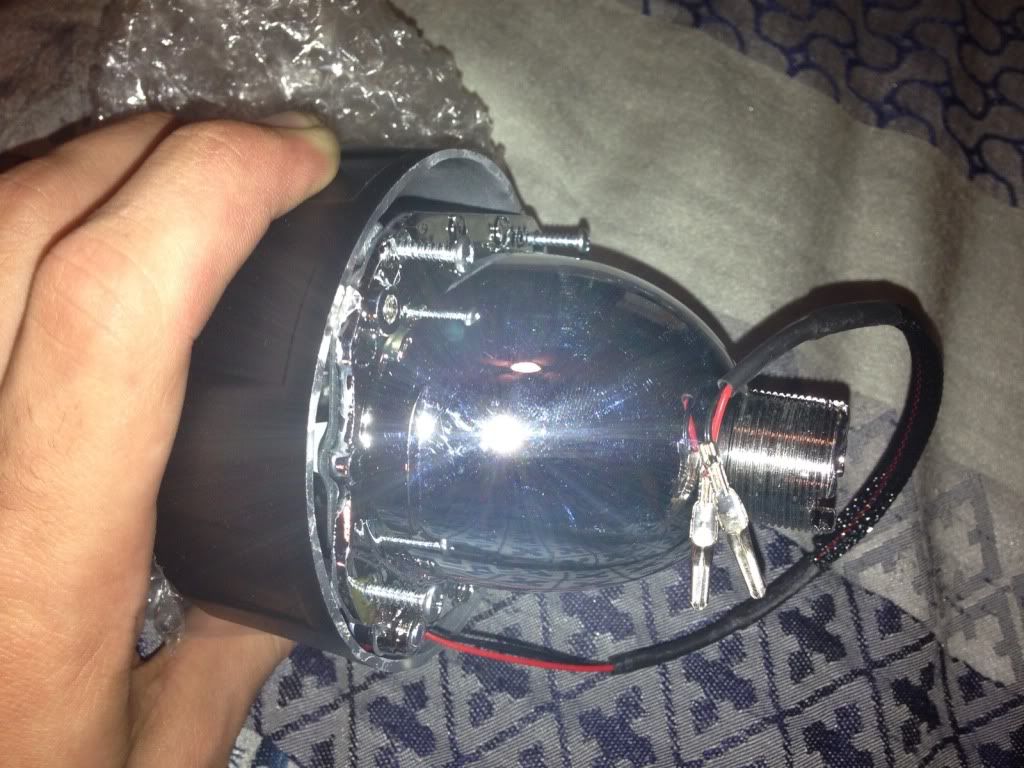
Now you will have this.
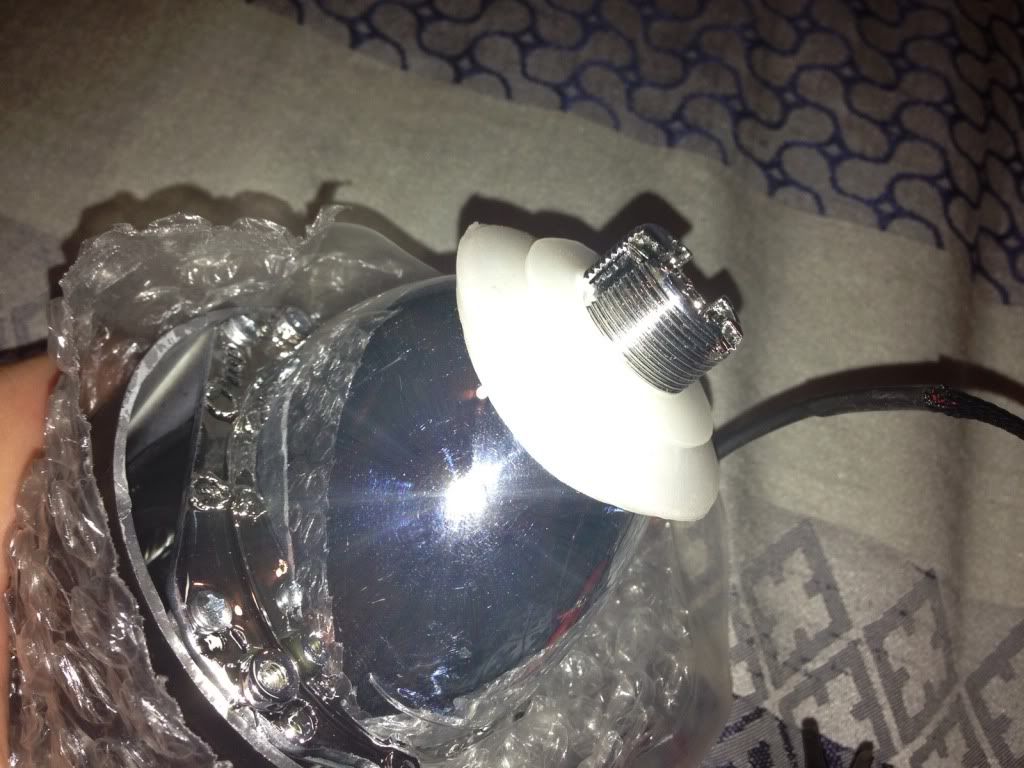
Get your two silicone washers and place them over the thread of the projector. Big one first then the smaller one on top.
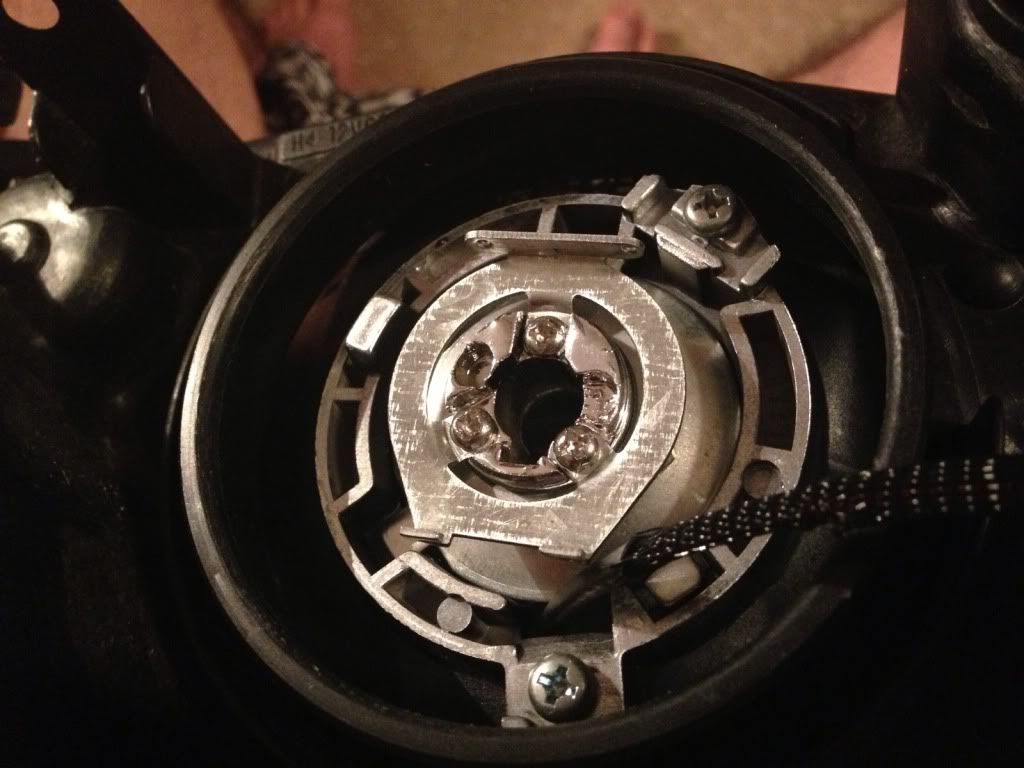
Before we mount the projector, it is necessary to modify the H4 adapter plate a little to adjust the rotation of the projector to be level. File away this little tab on the inside of the ring and smooth it off.
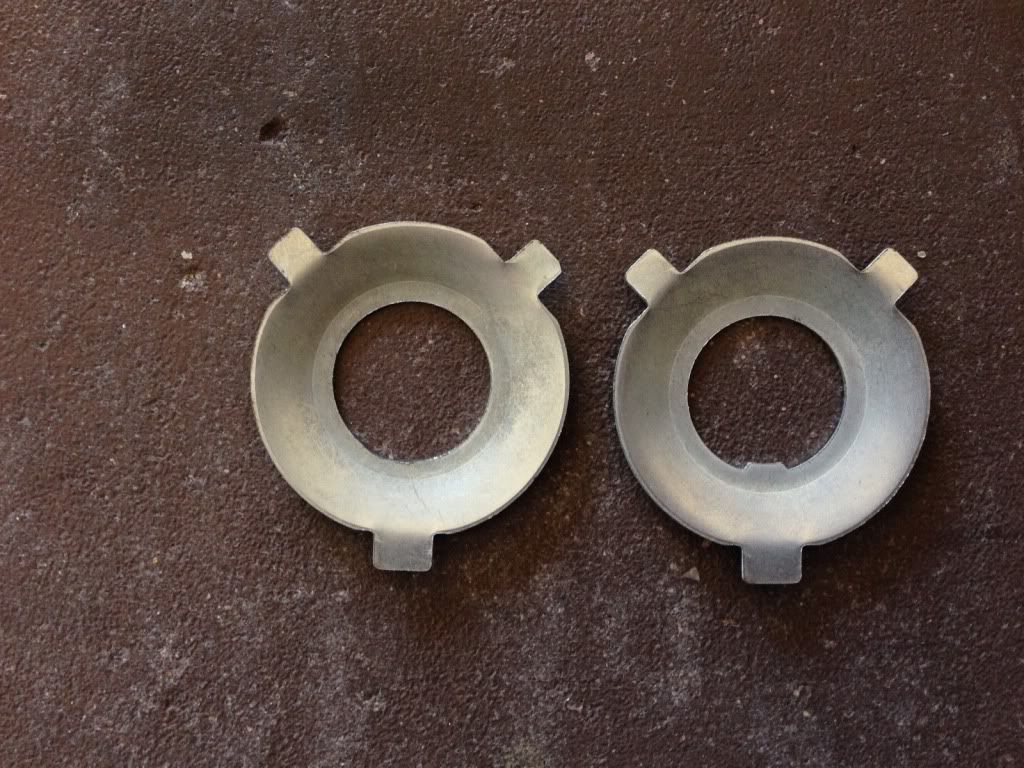
You can see where the tab would have sit in the thread of the projector, stopping it from being able to rotate.
*Note, pics from here on are BEFORE I filed away this tab, so the rotation will look a little off. This is before I figured out I needed to file that piece away.*
Get your headlight and place the thread on the end of the projector thru the hole in your reflector, roughly noting which way is up so you don't have to rotate the projector too much when levelling. (It says TOP on back of projector to see which way is up). Make sure the projectors wires go thru the little gap that was left at the bottom.
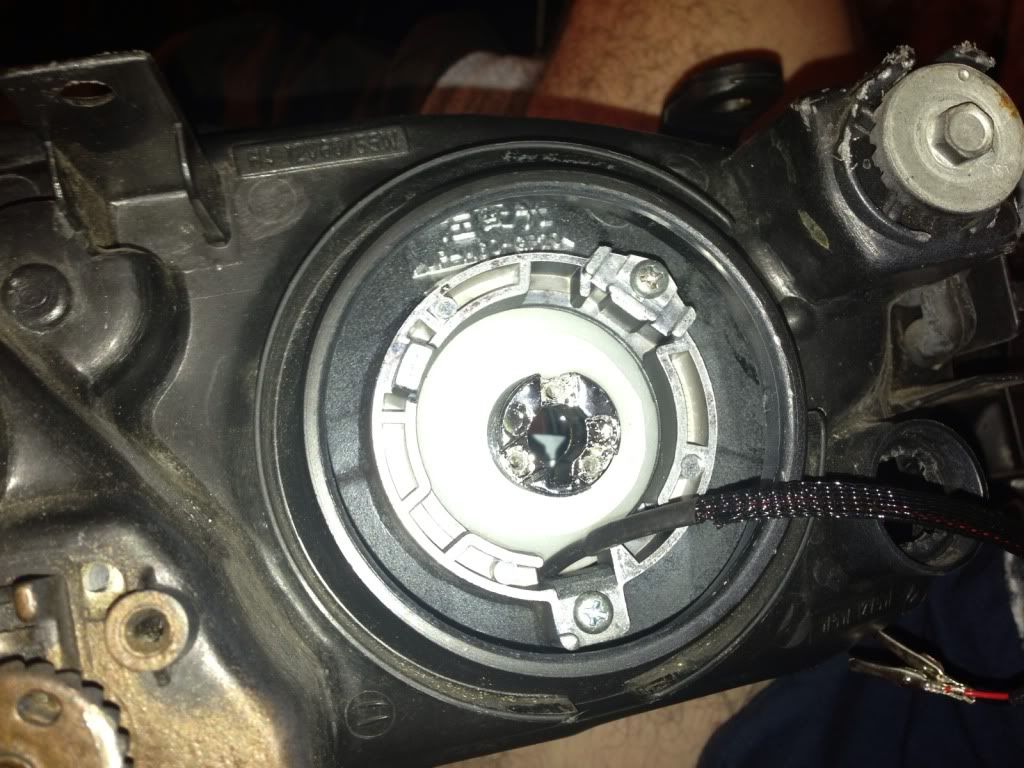
Now place the adapter plate over the thread like so
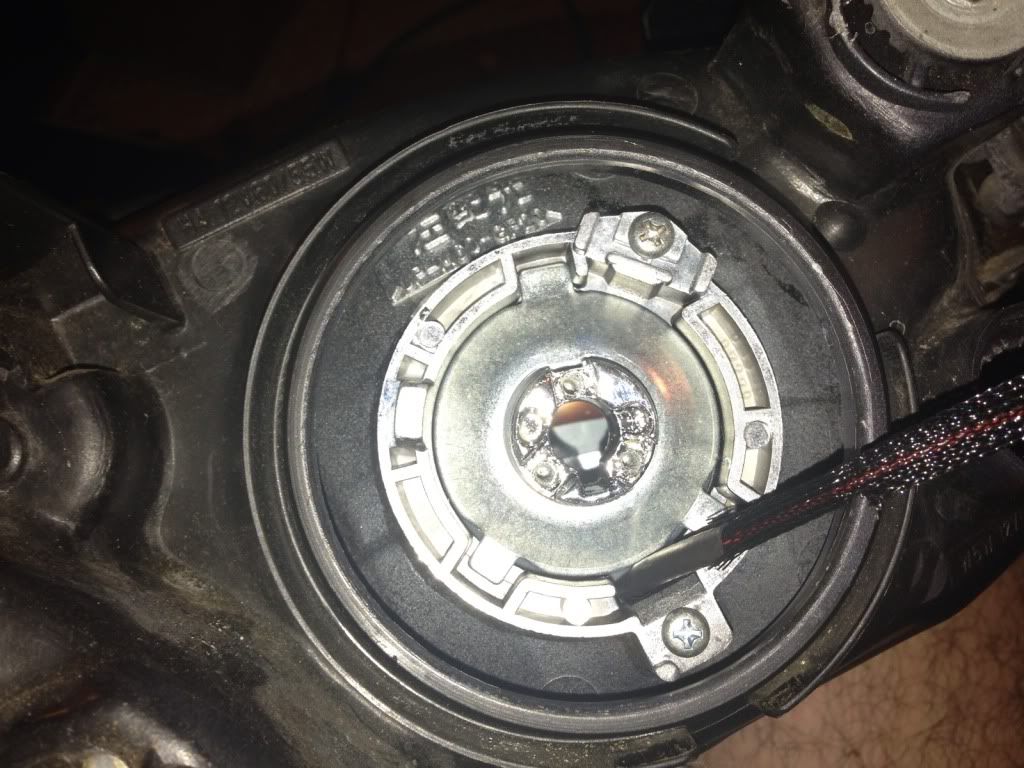
Screw on the locking ring as tight as you can with your fingers. Be careful not to cross thread this, it is very easy to do so.
Now screw back on the bulb holder with the three little screws. Make sure you don't drop any screws down the hole into the projector!
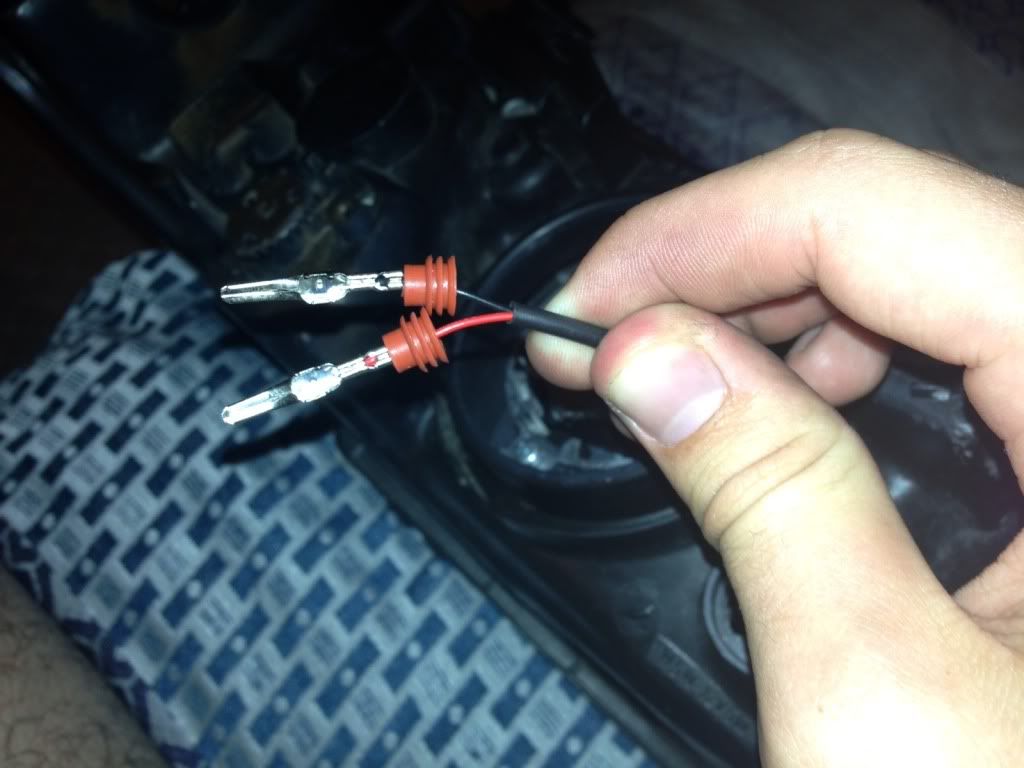
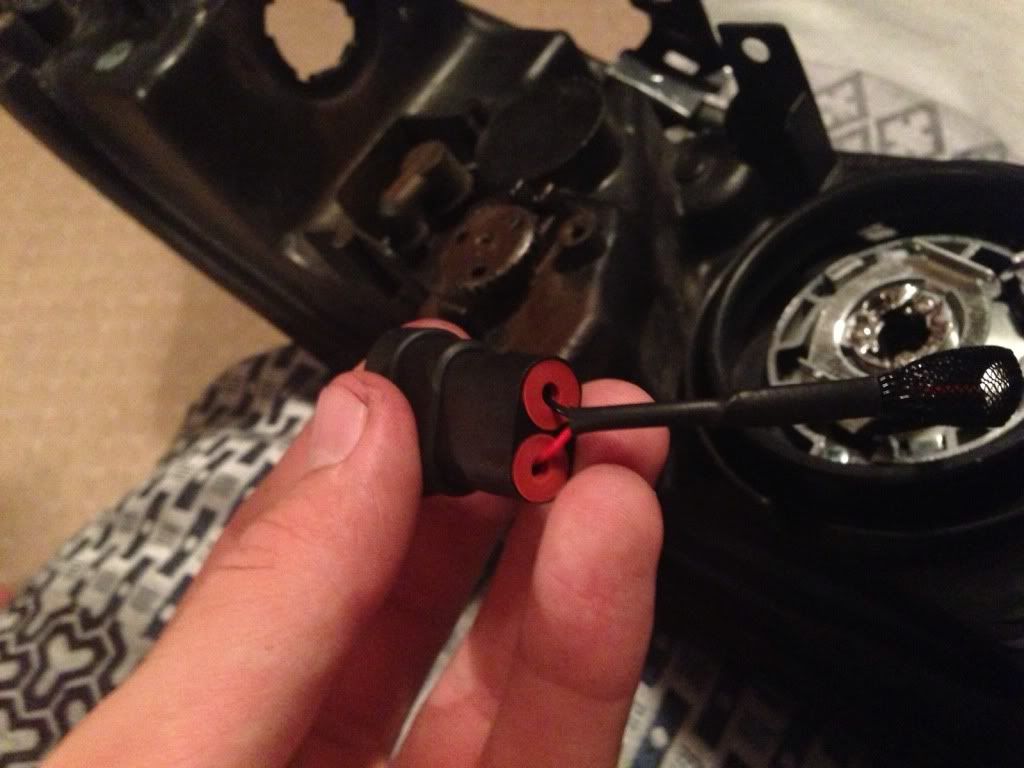
Now to attach the plug on the end of the projector wires.
First slip the orange grommets over the ends of the wires.
Now make sure you push the correct wire into the correct side of the plug. Get the other end from the big wiring harness to see which colour wire goes where and match them up. Black to black, red to red.
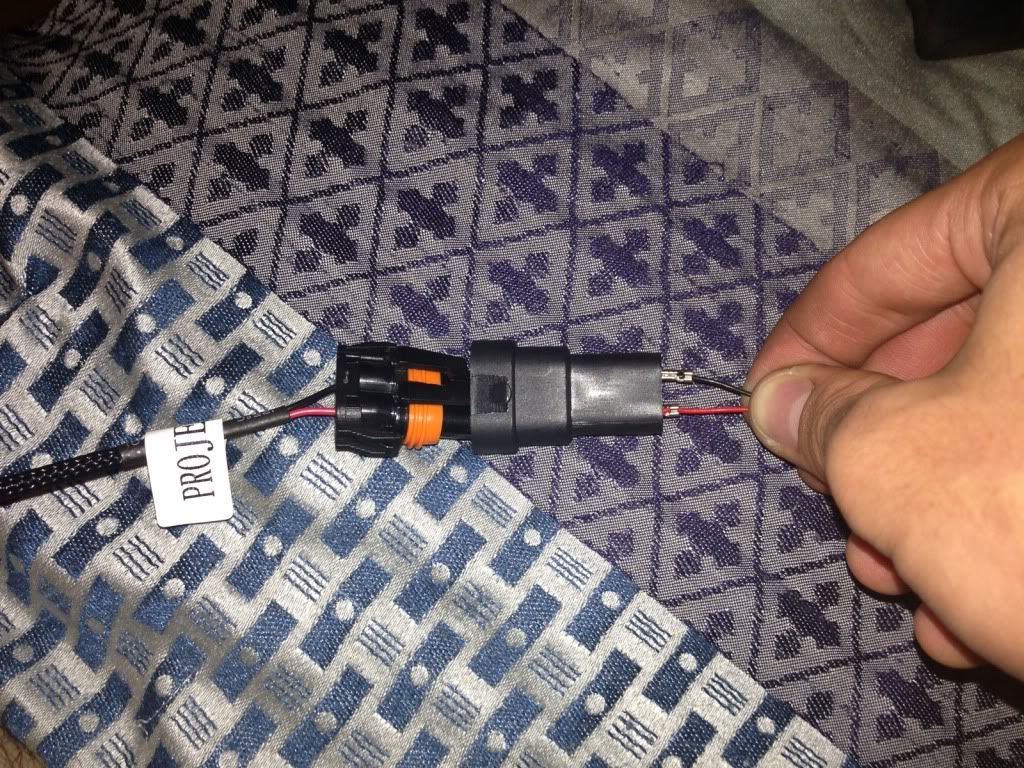
Once you know which side each goes on, push the clips into the plug and make sure they clip in and can't be pulled out. Then push the grommets into the plug.
Now insert the HID bulbs into the projector if you haven't already. Be VERY careful not to touch the bulb at all!
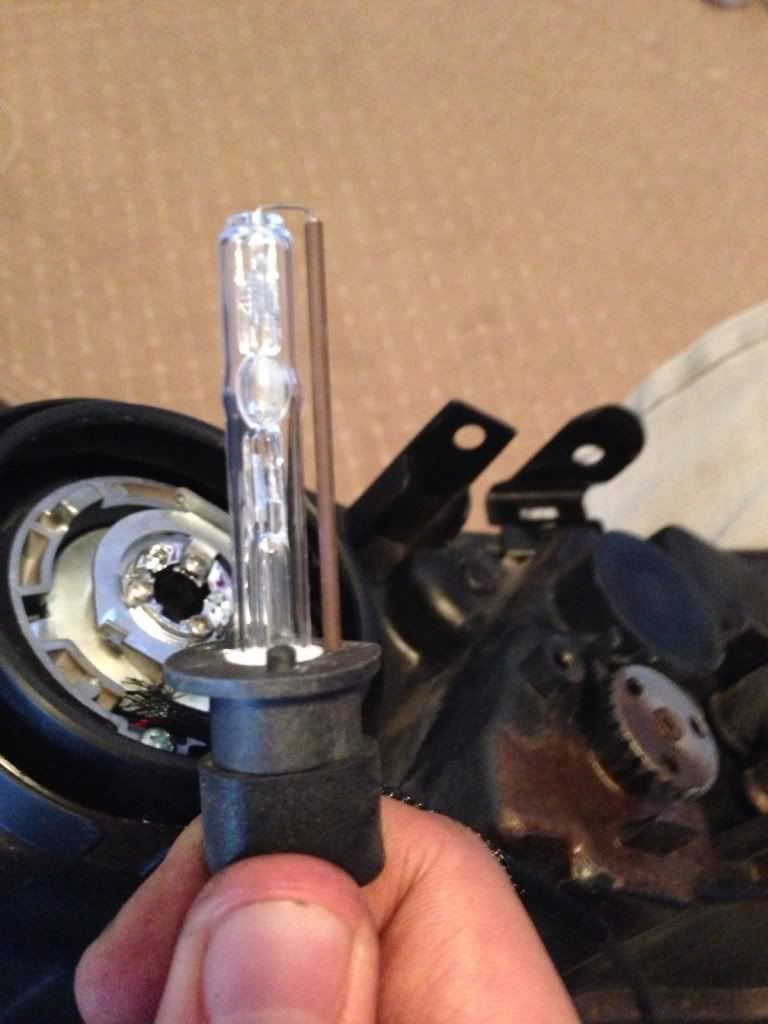
Bulb will only go in one way, like this
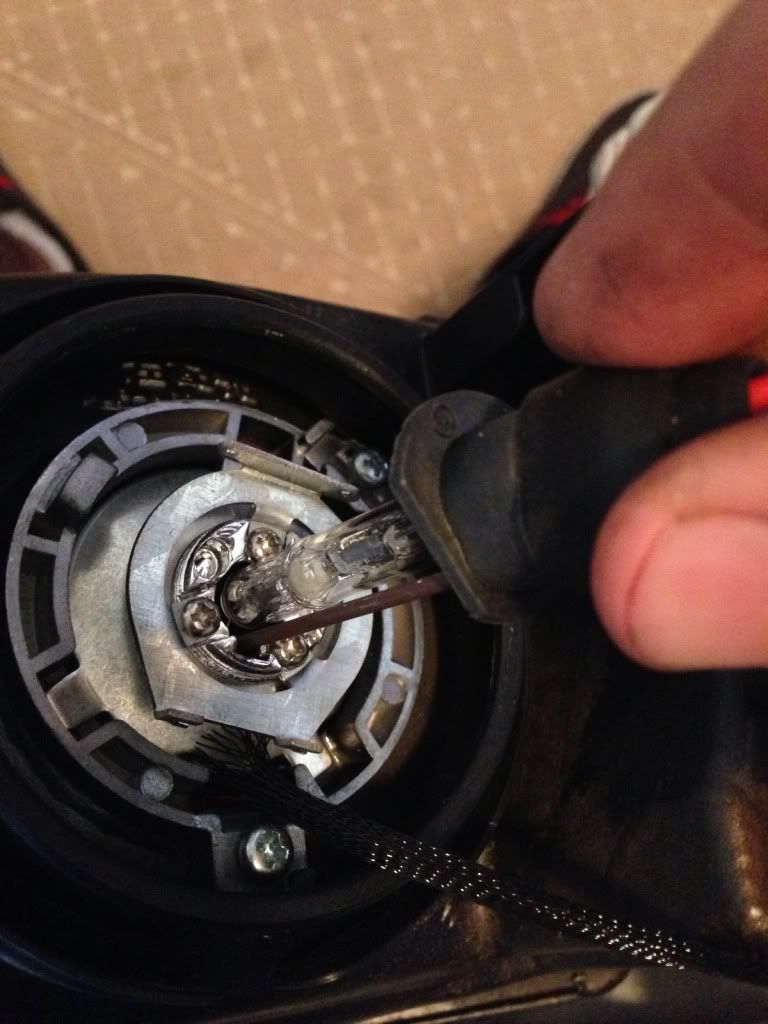
Put on the bulb clip to hold in the bulb so it looks like this
And that's it! Repeat for your other headlight.
Now you're all set to run the wiring harness in your car!
Here is a pdf of the wiring harness we have. You should have chosen the H4 harness when buying as our CE's have a H4 plug.
http://www.theretrofitsource.com/pdf/tr ... arness.pdf
All wires on the harness have a label on them, so you know whether it should be a wire going to a positive 12v, negative ground, the ballast, the projector or the input plug.
Find the locations where you're going to mount your ballasts. The pictures below is where I mounted mine. Probably not the best place, somewhere more out of (the coppers) sight would be better since HID's are meant to be illegal (god knows why, it's not like these in the projectors will blind anyone). But anyway. Screw on the supplied bracket to the back of the ballast. The gold screw happens to be a perfect fit for the already threaded holes on the side of the car so that's where I screwed my ballasts onto, they're nice and secure there.
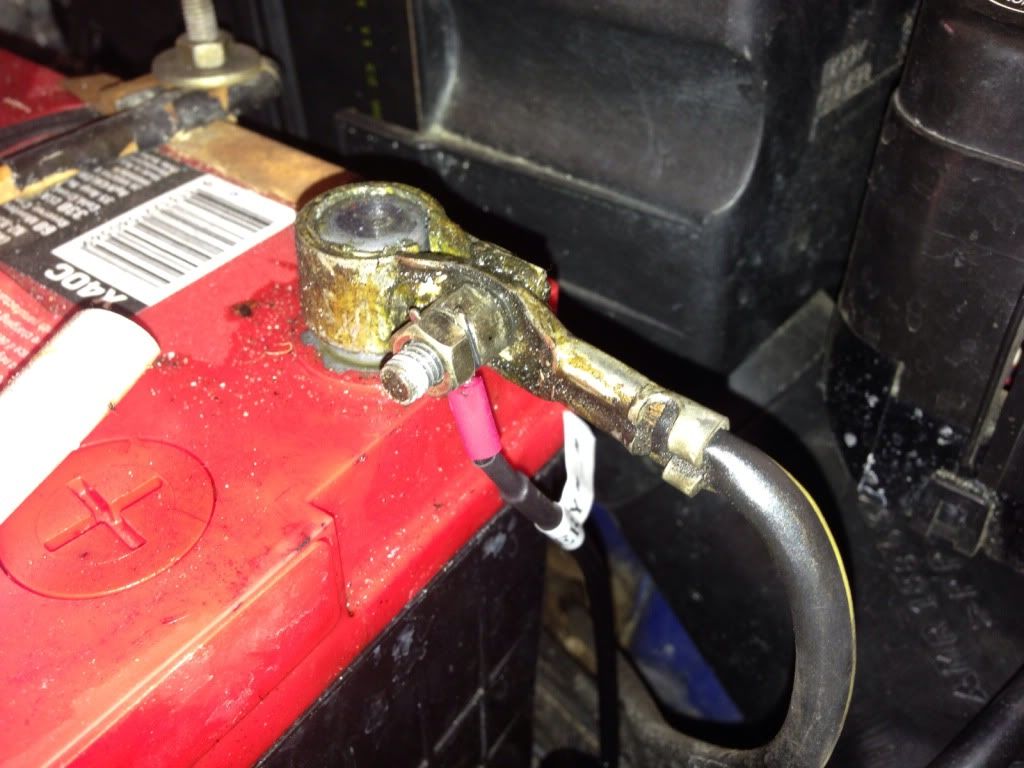
Drivers side ballast. Note in the picture you can also see where I've screwed my ground into (the wire with the little red piece on it)
Passenger side ballast
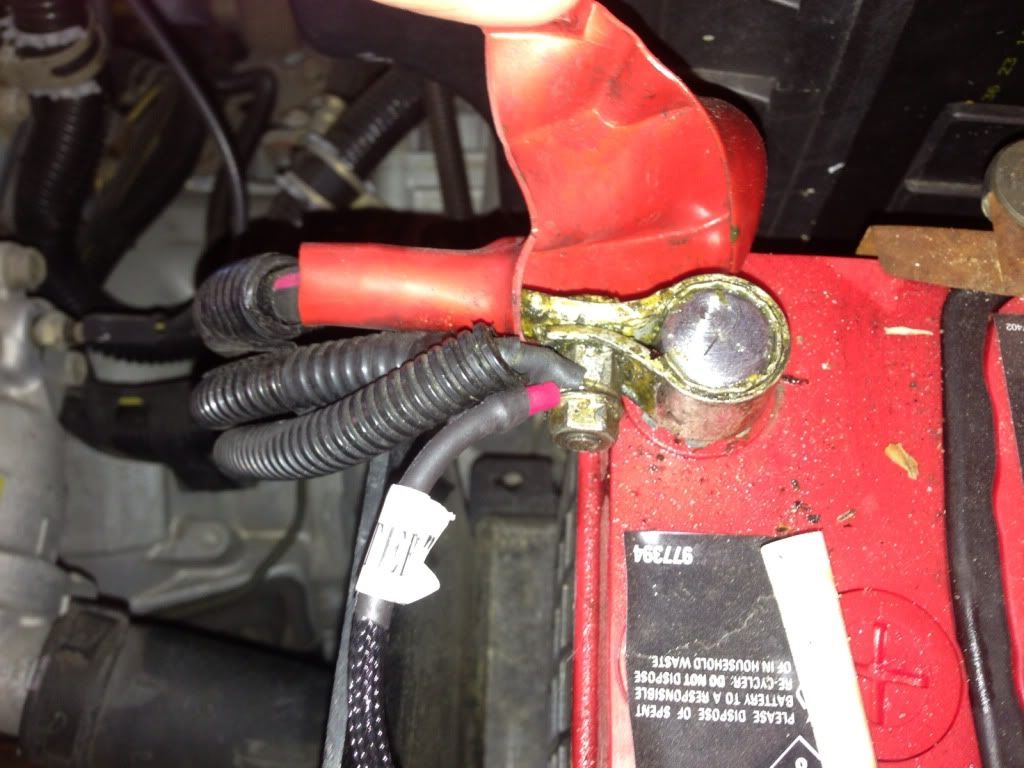
I connected my passenger side ground onto the negative terminal of the battery
I ran the harness and made it roughly follow the stock harness that runs from the one side of the front of the car to the other. Make sure there is no part of the wiring that can catch or scrape on anything under the car. Use as many zip ties as you need to secure it. I only used one lol.
These next few steps I'm sure most people can do without pics..
Obviously we connect the input plug to the H4 plug that's on the battery side. There is only one input, so the H4 plug on the other side of the car will no longer be used.
Connect your ballast cables to the ballasts.
Connect your projector cables to the projectors.
Connect your bulb's two wires to the wires coming from the ballasts.
Finally once everything is hooked up, connect the positive 12v to the positive battery terminal.
Now to do some rough leveling!
Bolt in the headlights, don't just let them rest there coz they won't sit right for you to do some leveling.
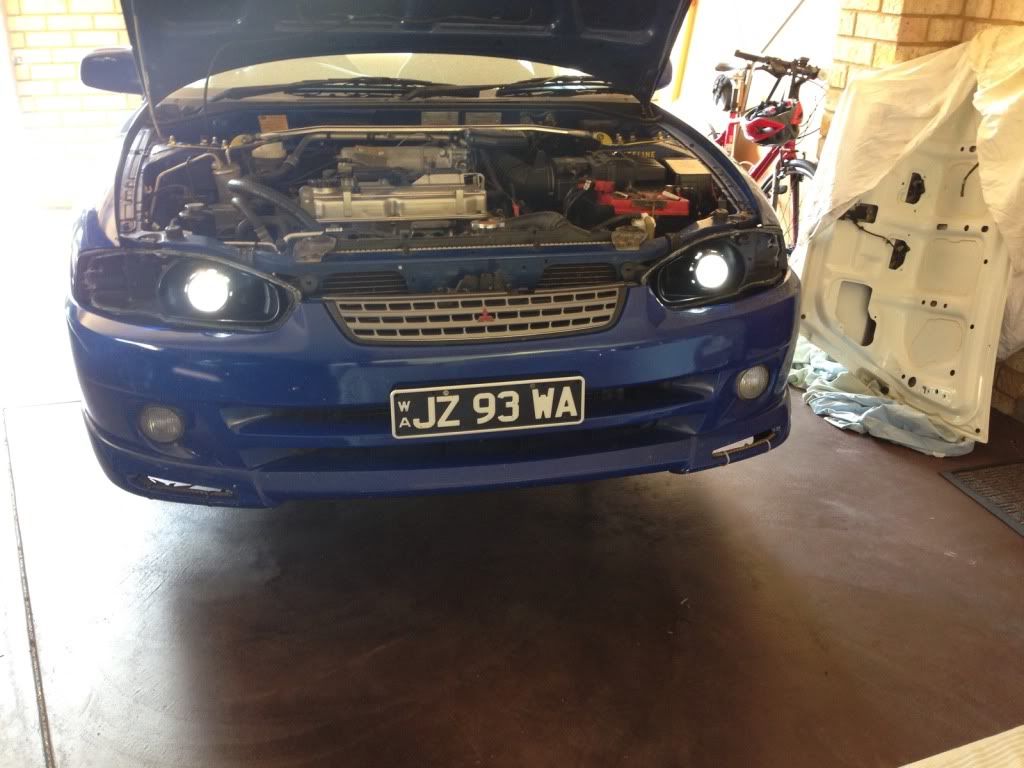
(yes in the picture I haven't bolted them in, but I did when I was leveling them!)
All we are trying to do here is adjust the rotation of the projector before we seal it all up. It is much harder to adjust this after sealing up the headlight. Make sure the cut off lines of both projectors are FLAT. If you didn't file the little tab in the locking ring earlier you will not be able to adjust the rotation here, and your cut off will be majorly slanted instead of horizontal.
Put something in front of each headlight to get a better look at the individual cut offs to adjust. Adjust just by grabbing the shroud of the projector and twist.
This may slightly loosen the lock ring so you can go back and make sure its still tight if you wish.. I didn't do this.
Here is my cut off
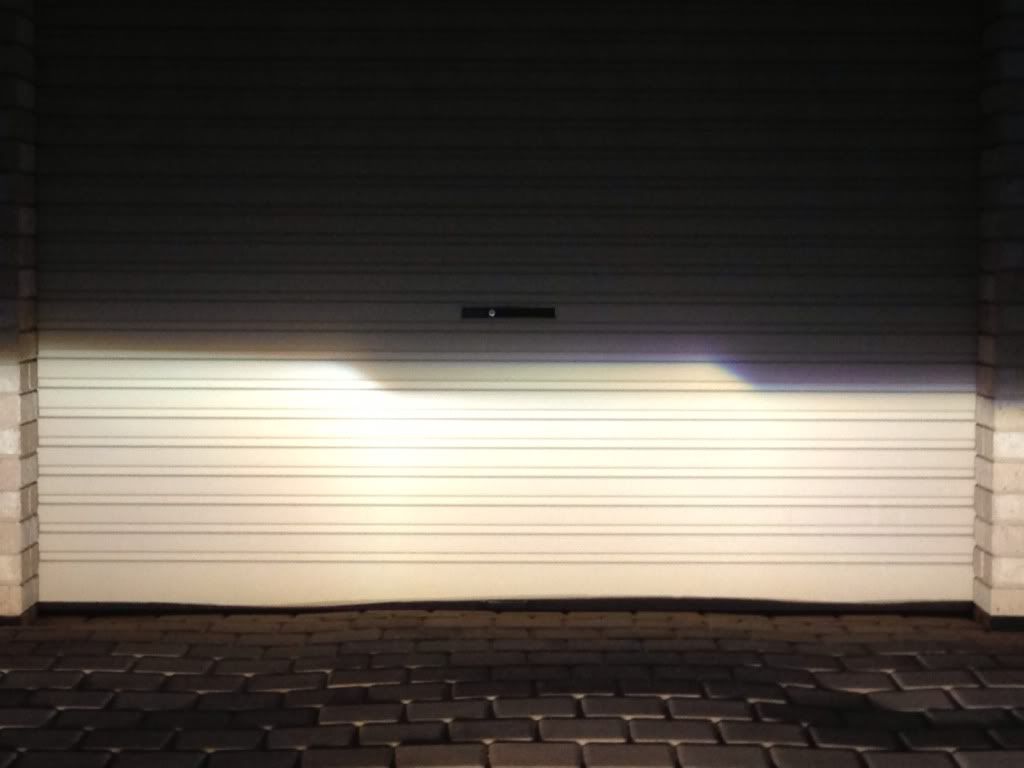
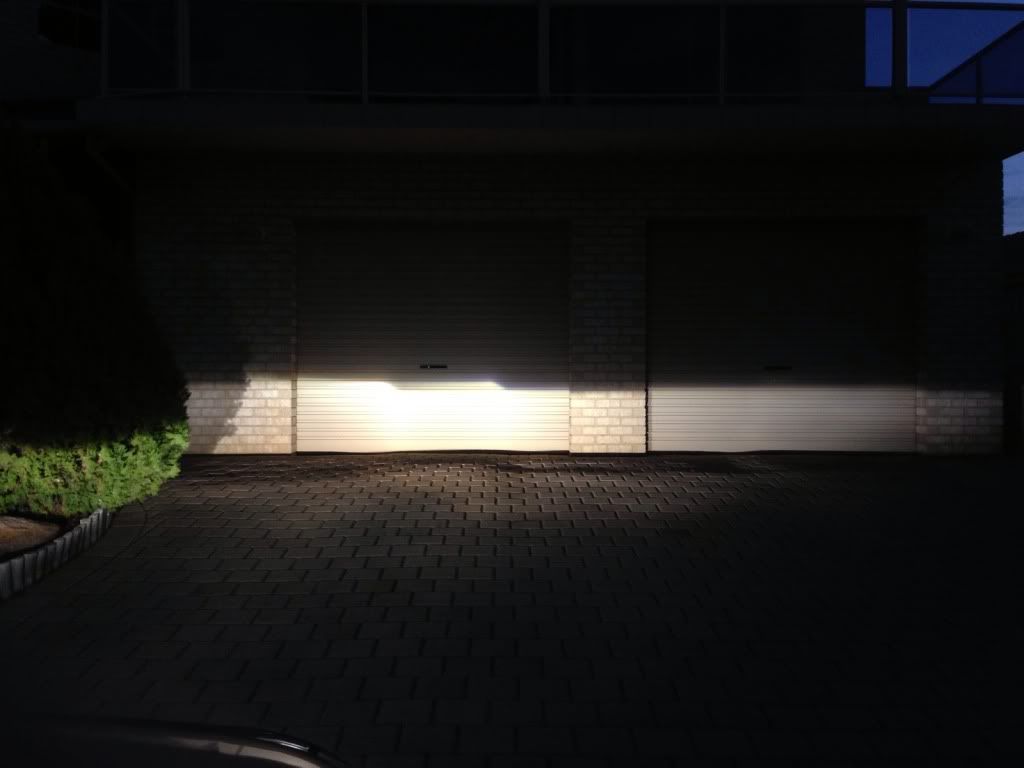
You can see how flat and level it is with the garage door lines
You can either refine your height and horizontal adjustments now or after you've sealed up the headlight. Do do this you use the factory adjusters behind the headlight.
Here is a good link to a DIY to align your headlights properly. The DIY shows a LHD car and ours is RHD so the cutoff will be opposite, but it's obviously the same heights and stuff.
http://legacygt.com/forums/showthread.p ... 54740.html
Time to reseal!
Once you're happy with the rotation of your headlights, reseal the lens on. The glue should all still be there from before so you won't need any more glue to help reseal.
As before, preheat your oven to 130*C. First take out the HID bulb. Then push the lens roughly back onto the headlight. Place back in the oven on a piece of cardboard and let it cook again for 7 minutes.
With some oven mits take it out holding the lens and push it together as tightly as you can. While the glue is still soft put in those 2 screws again, this will help pull the lens on at this edge and hold it there while the glue is setting.
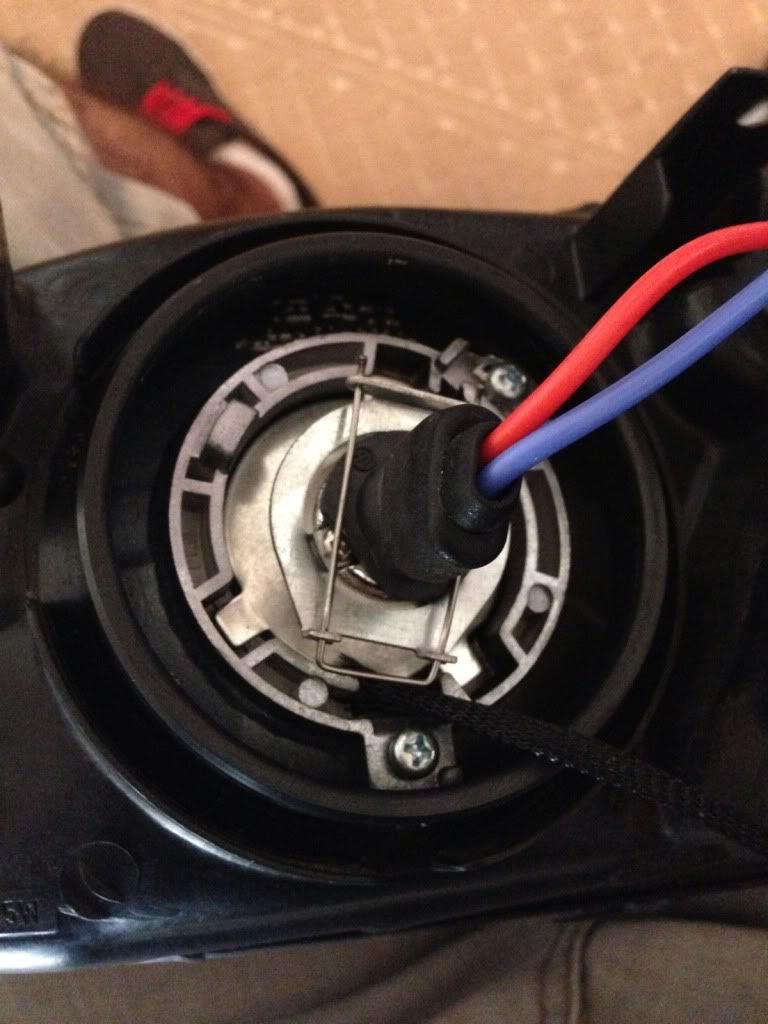
Once you've let it cool down enough, re insert the HID bulb and bulb clip, and place the dust boot cover back on pushing the wires thru.
Bolt them back onto your car, plug in the indicator and you're good to go!
If you haven't yet, do the fine adjustments of height and horizontal adjustment when it gets dark in front of a wall to align them good.
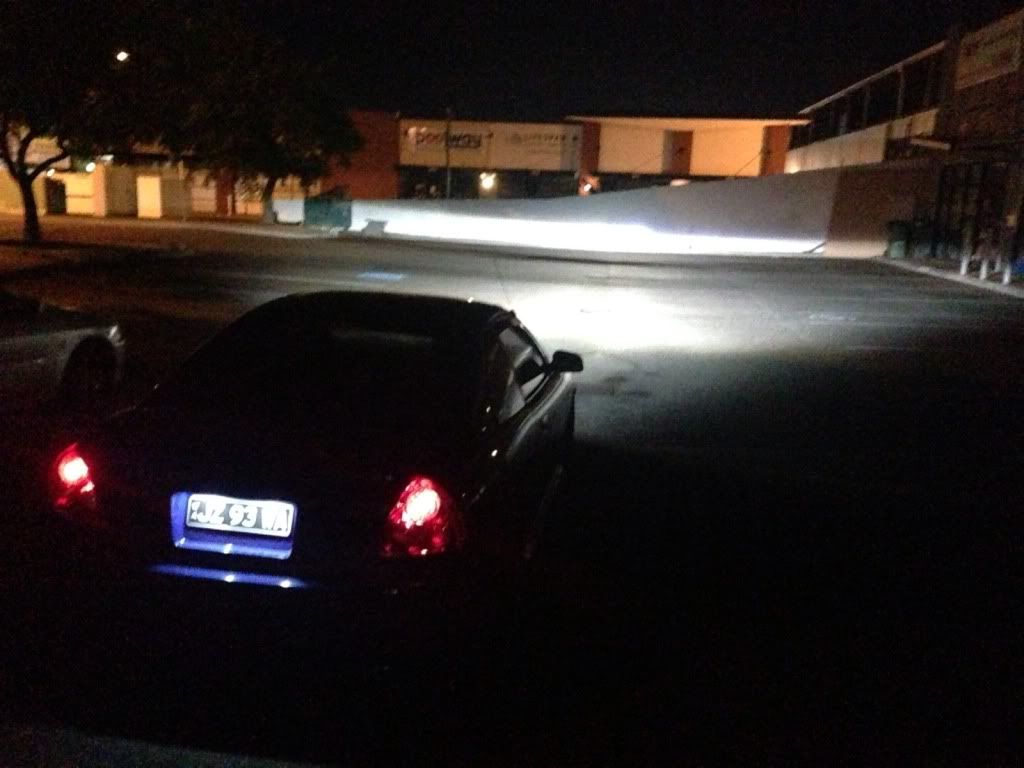
Turn them on and do some admiring")
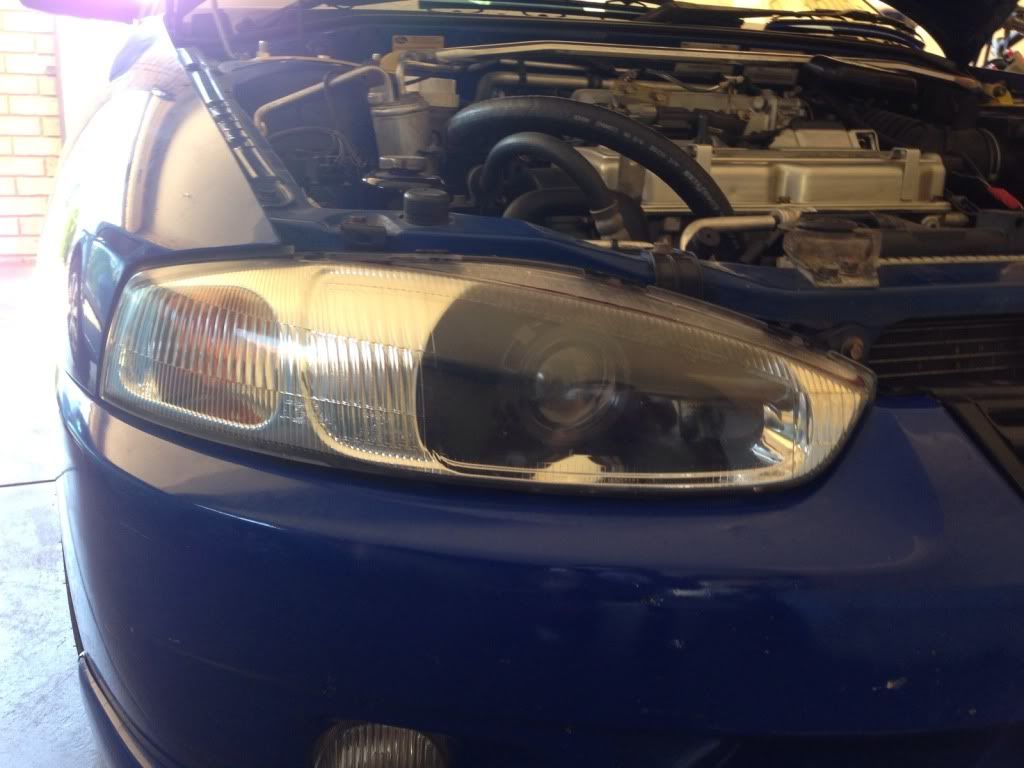
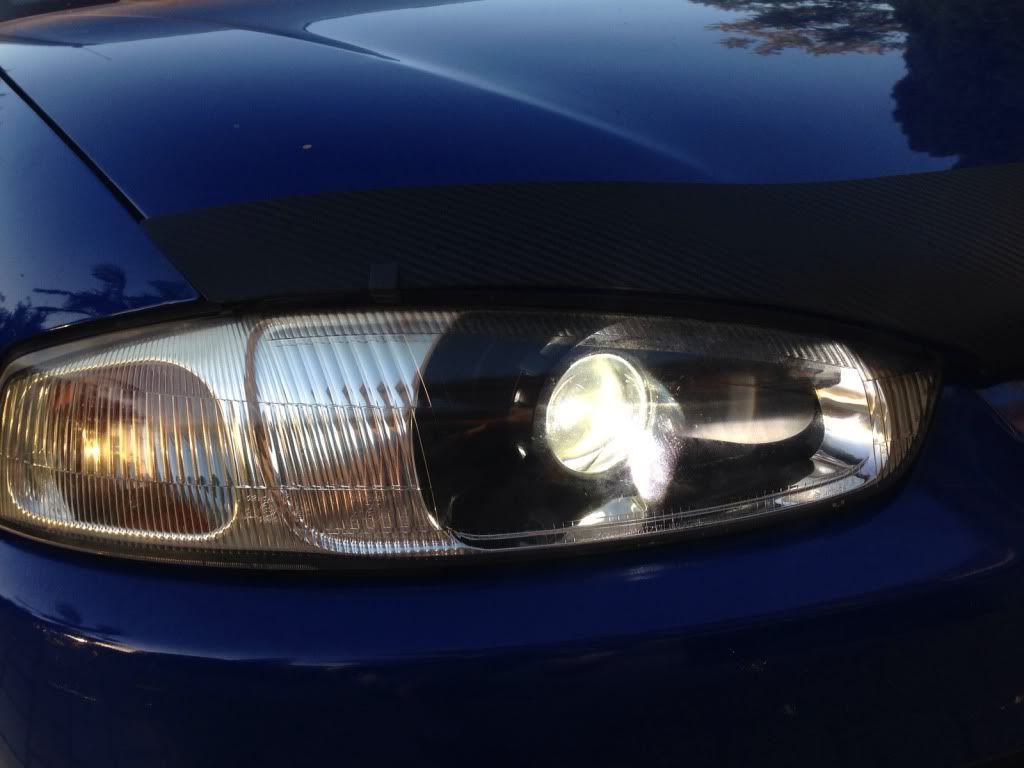
Hopefully I haven't forgot anything :/
Any questions and I will answer!
Things you'll need.
- stock headlights
- Projector Kit (link below)
- Plastic primer and paint (optional, cost me $7 from supercheap auto)
- oven
- phillips and flat head screw drivers
You'll want to buy the Bi-Xenon Morimoto Mini Stage III Kit (H1) from The Retrofit Source (TRS) here...
https://www.theretrofitsource.com/produ ... cts_id=227
These are the options I selected.
It was about $325 delivered with the 5% discount you get by entering a code you'll find on TRS's facebook page. I didn't need the re sealing glue so coulda saved 10 bucks there but I got it because I didn't know if I'd need it or not. I'm telling you now you won't need it, save your money.
Ok, on with the modding..
This is to open up your headlights.
Firstly, take out the main globe and indicator globes and plugs, the parkers plugs, rubber dust cover and metal globe holder clip. Clip comes out by loosening the screw holding it on.
Then undo these 2 screws.
(picture courtesy of Joshy_Morris, forgot to get one myself)
Place all the screws and plugs in a container so you don't loose them.
On the kitchen table, grab a towel for your headlight to sit on
Preheat the oven to 130*C
Once preheated, place your headlight in on a piece of cardboard (not on bare metal) in the oven and let it cook for 7 minutes.
Take out your headlight with some oven mits lifting from the metal bracket, not the plastic one as it might bend a little, and get your flat head screw driver and pry gently at a corner. Once you can get your fingers in there, pull the lens off. It will take a bit of effort. Watch for the plastic clip parts that hold on the lens also.
Now you have it opened, we need to undo the little reflector thingy. To remove, unscrew the bottom screw from behind the headlight here.
(picture shows screw already removed, you can still see the hole it was in)
You won't need these pieces anymore, but I still placed them in my container with all the other screws, globes and plugs.
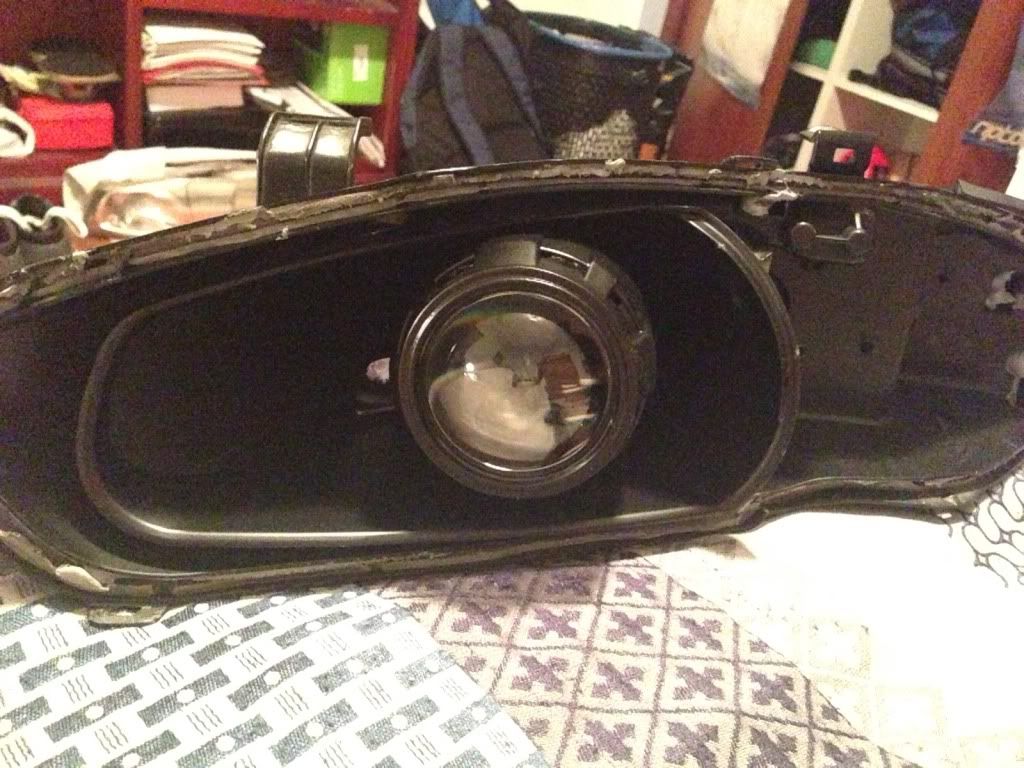
Finally you will have something looking like this!
Now I painted the reflector and shroud. Paint whatever you want, or not at all.
Mask it all up and give 2 coats of primer, waiting 5 mins between the coats.
Then however many coats of paint you want. I sprayed 4 coats.
Now we're ready to fit in the projectors!
During this whole process, try your best not to touch the projector lens! Fingerprints are nasty.
Here is a link to a hardware installation guide I followed.
http://www.theretrofitsource.com/pdf/tr ... de_1-2.pdf
Take your projector out of the box. There will be a little zip lock bag in there too with clips screws and plates.
Firstly remove the bulb holder from the rear of the projector by removing these 3 screws. Mine were super duper tight and hard to get off, make sure you push as hard as you can when loosening.
And you will end up with this.
I purchased the mini gatling gun shroud so this is how you mount that one. I personally think it looks the best, nice and clean.
There should be 4 long screws in that mini zip lock bag, these are used to mount the shroud on the projector. Place the shroud over the projector and line up the holes. It only goes on one way so rotate until they line up, then screw in.
Now you will have this.
Get your two silicone washers and place them over the thread of the projector. Big one first then the smaller one on top.
Before we mount the projector, it is necessary to modify the H4 adapter plate a little to adjust the rotation of the projector to be level. File away this little tab on the inside of the ring and smooth it off.
You can see where the tab would have sit in the thread of the projector, stopping it from being able to rotate.
*Note, pics from here on are BEFORE I filed away this tab, so the rotation will look a little off. This is before I figured out I needed to file that piece away.*
Get your headlight and place the thread on the end of the projector thru the hole in your reflector, roughly noting which way is up so you don't have to rotate the projector too much when levelling. (It says TOP on back of projector to see which way is up). Make sure the projectors wires go thru the little gap that was left at the bottom.
Now place the adapter plate over the thread like so
Screw on the locking ring as tight as you can with your fingers. Be careful not to cross thread this, it is very easy to do so.
Now screw back on the bulb holder with the three little screws. Make sure you don't drop any screws down the hole into the projector!
Now to attach the plug on the end of the projector wires.
First slip the orange grommets over the ends of the wires.
Now make sure you push the correct wire into the correct side of the plug. Get the other end from the big wiring harness to see which colour wire goes where and match them up. Black to black, red to red.
Once you know which side each goes on, push the clips into the plug and make sure they clip in and can't be pulled out. Then push the grommets into the plug.
Now insert the HID bulbs into the projector if you haven't already. Be VERY careful not to touch the bulb at all!
Bulb will only go in one way, like this
Put on the bulb clip to hold in the bulb so it looks like this
And that's it! Repeat for your other headlight.
Now you're all set to run the wiring harness in your car!
Here is a pdf of the wiring harness we have. You should have chosen the H4 harness when buying as our CE's have a H4 plug.
http://www.theretrofitsource.com/pdf/tr ... arness.pdf
All wires on the harness have a label on them, so you know whether it should be a wire going to a positive 12v, negative ground, the ballast, the projector or the input plug.
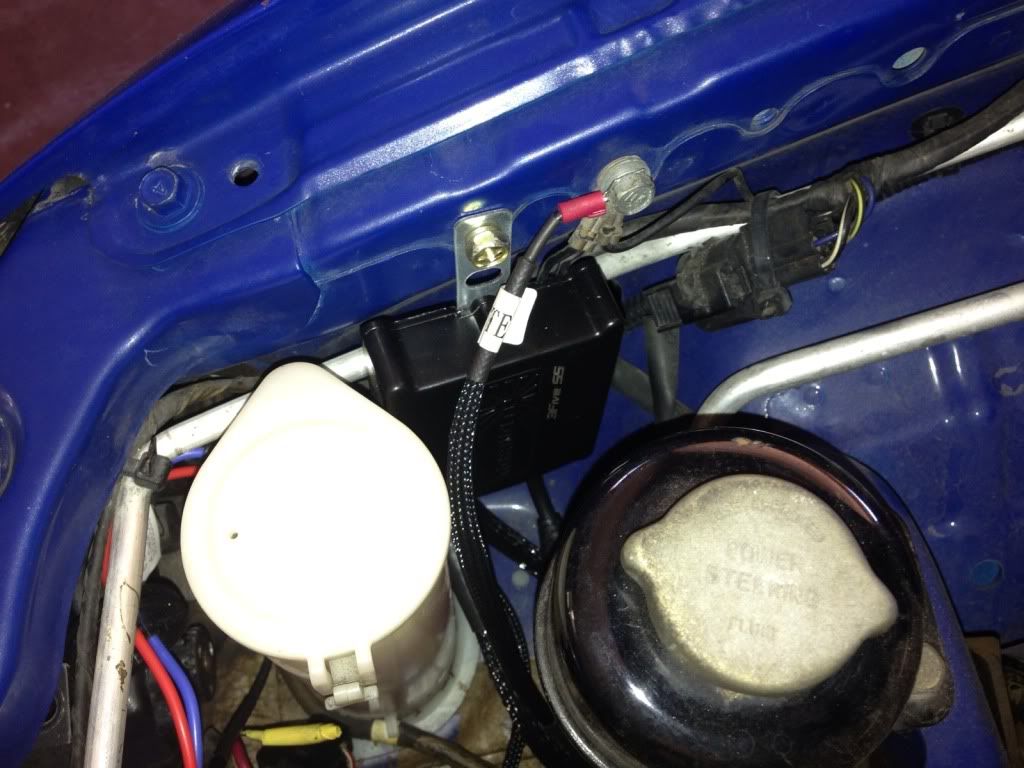
Find the locations where you're going to mount your ballasts. The pictures below is where I mounted mine. Probably not the best place, somewhere more out of (the coppers) sight would be better since HID's are meant to be illegal (god knows why, it's not like these in the projectors will blind anyone). But anyway. Screw on the supplied bracket to the back of the ballast. The gold screw happens to be a perfect fit for the already threaded holes on the side of the car so that's where I screwed my ballasts onto, they're nice and secure there.
Drivers side ballast. Note in the picture you can also see where I've screwed my ground into (the wire with the little red piece on it)
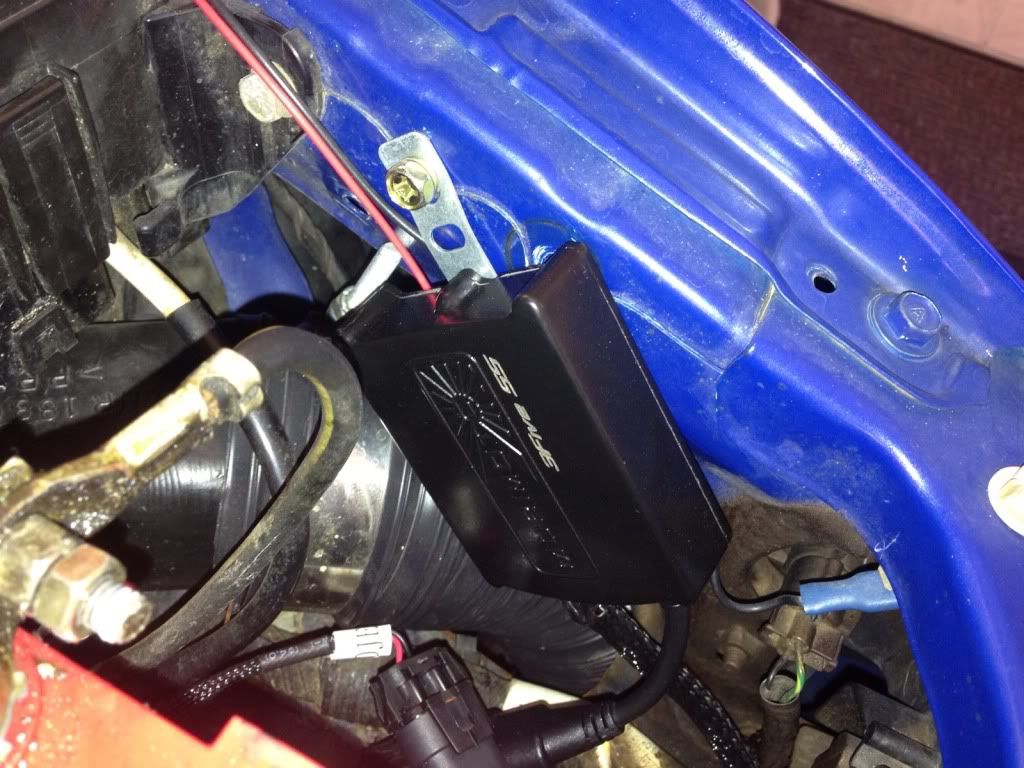
Passenger side ballast
I connected my passenger side ground onto the negative terminal of the battery
I ran the harness and made it roughly follow the stock harness that runs from the one side of the front of the car to the other. Make sure there is no part of the wiring that can catch or scrape on anything under the car. Use as many zip ties as you need to secure it. I only used one lol.
These next few steps I'm sure most people can do without pics..
Obviously we connect the input plug to the H4 plug that's on the battery side. There is only one input, so the H4 plug on the other side of the car will no longer be used.
Connect your ballast cables to the ballasts.
Connect your projector cables to the projectors.
Connect your bulb's two wires to the wires coming from the ballasts.
Finally once everything is hooked up, connect the positive 12v to the positive battery terminal.
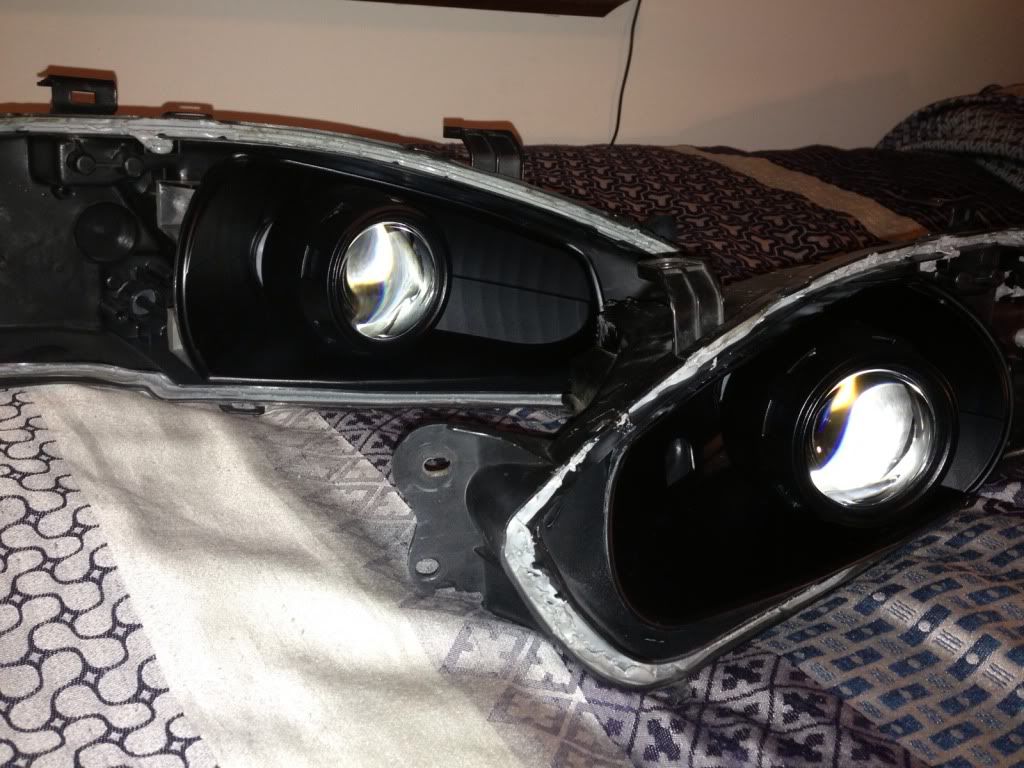
Now to do some rough leveling!
Bolt in the headlights, don't just let them rest there coz they won't sit right for you to do some leveling.
(yes in the picture I haven't bolted them in, but I did when I was leveling them!)
All we are trying to do here is adjust the rotation of the projector before we seal it all up. It is much harder to adjust this after sealing up the headlight. Make sure the cut off lines of both projectors are FLAT. If you didn't file the little tab in the locking ring earlier you will not be able to adjust the rotation here, and your cut off will be majorly slanted instead of horizontal.
Put something in front of each headlight to get a better look at the individual cut offs to adjust. Adjust just by grabbing the shroud of the projector and twist.
This may slightly loosen the lock ring so you can go back and make sure its still tight if you wish.. I didn't do this.
Here is my cut off
You can see how flat and level it is with the garage door lines
You can either refine your height and horizontal adjustments now or after you've sealed up the headlight. Do do this you use the factory adjusters behind the headlight.
Here is a good link to a DIY to align your headlights properly. The DIY shows a LHD car and ours is RHD so the cutoff will be opposite, but it's obviously the same heights and stuff.
http://legacygt.com/forums/showthread.p ... 54740.html
Time to reseal!
Once you're happy with the rotation of your headlights, reseal the lens on. The glue should all still be there from before so you won't need any more glue to help reseal.
As before, preheat your oven to 130*C. First take out the HID bulb. Then push the lens roughly back onto the headlight. Place back in the oven on a piece of cardboard and let it cook again for 7 minutes.
With some oven mits take it out holding the lens and push it together as tightly as you can. While the glue is still soft put in those 2 screws again, this will help pull the lens on at this edge and hold it there while the glue is setting.
Once you've let it cool down enough, re insert the HID bulb and bulb clip, and place the dust boot cover back on pushing the wires thru.
Bolt them back onto your car, plug in the indicator and you're good to go!
If you haven't yet, do the fine adjustments of height and horizontal adjustment when it gets dark in front of a wall to align them good.
Turn them on and do some admiring
Hopefully I haven't forgot anything :/
Any questions and I will answer!