tryg
New Member
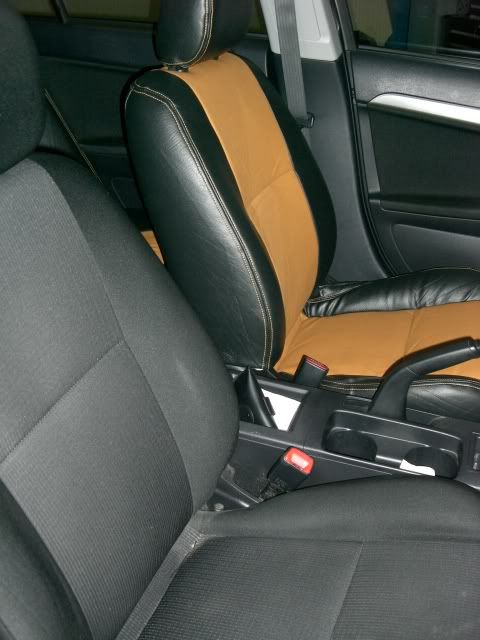
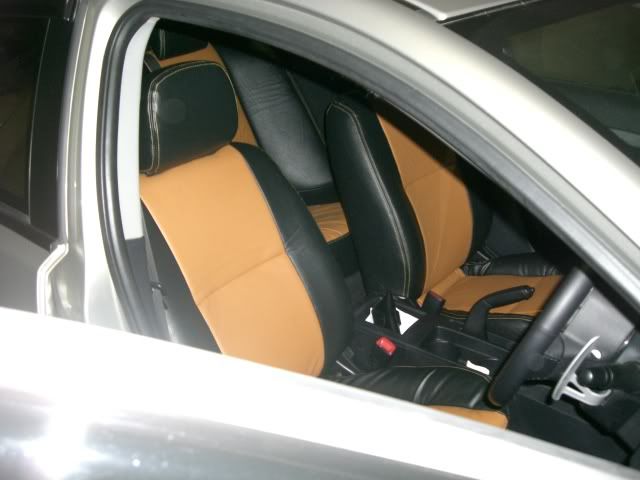
Hi all. I sourced a bonded-leather interior (this just means not full-hide leather, which would cost many thousands) for $595, custom made for my lancer, to my colour specs.
This DIY is not meant to showcase the colour, nor seeking comments on my choice... its just a DIY! I really don't care if you like the colour combo or not.
OK, that out of the way, you can find several dealers in this type of re-trim on eBay... I wont mention my choice here, PM me if you require.
You will need some tools, patience and basic skill. Source all your tools before you start because the seats will come out!
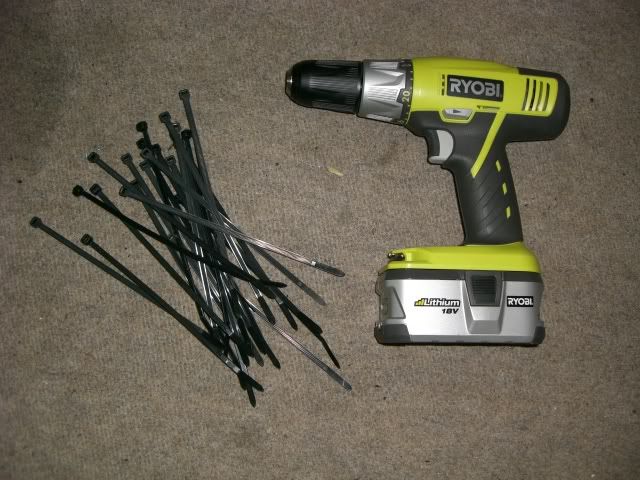
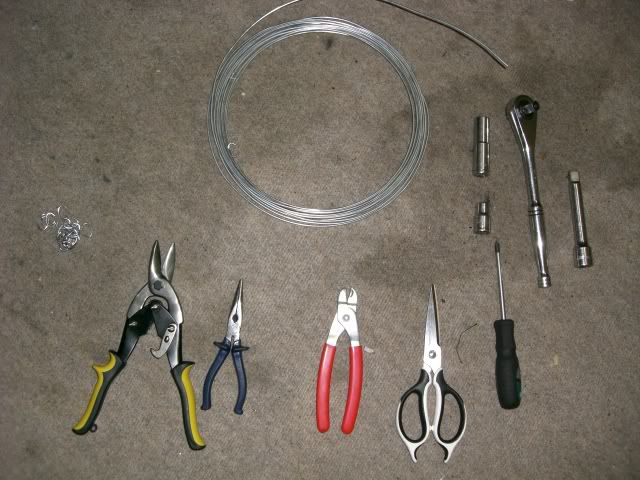
You will need sockets (to remove seat bolts), pliers, tin-snips or cutters (for cutting the C-clips), a philips screw driver, good scissors, a C-clip tool, C-clips (bag of 500 should do), some 2.5mm wire (comes in a 24m roll). Here is a picture of the tools.
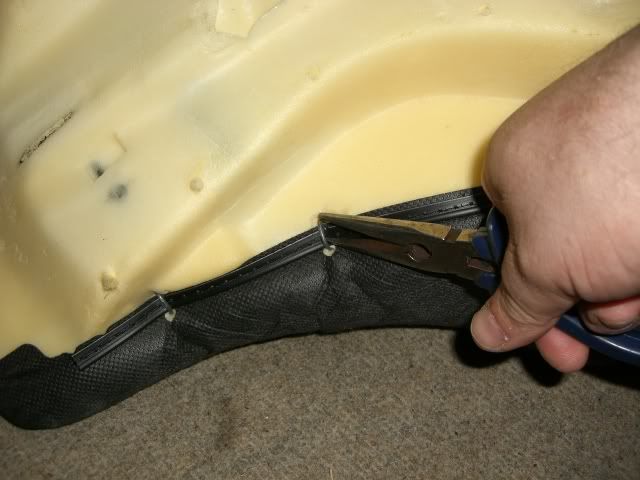
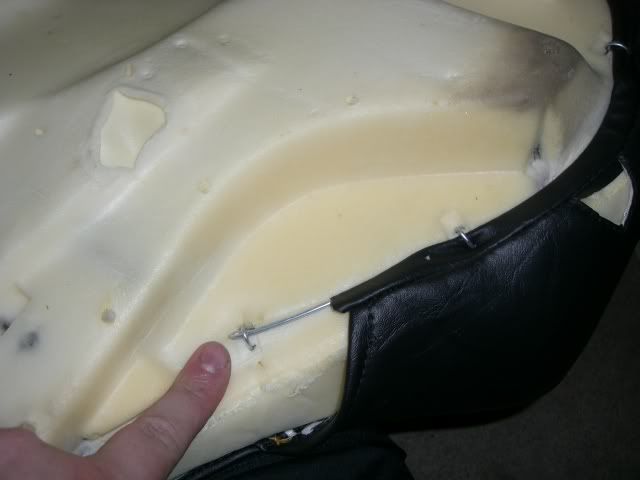
Now, start by removing the 5 parts to your back seat. Choose a part (I started with the bottom seat cushion) and remove the original trimming, using the tin snip/cutters on all the C-clips. Carefully remove all metal shards.
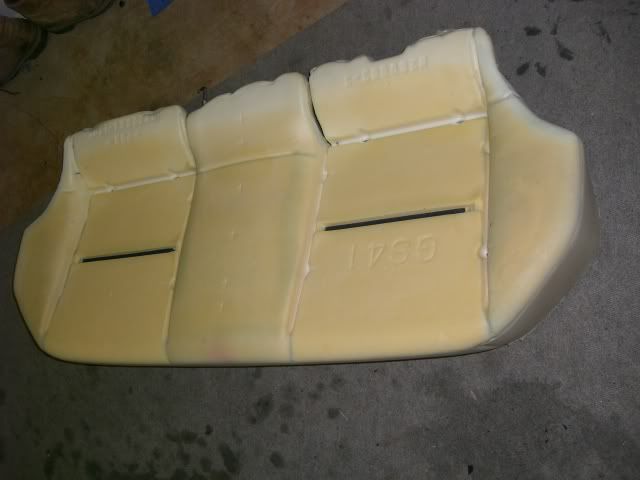
All removed.
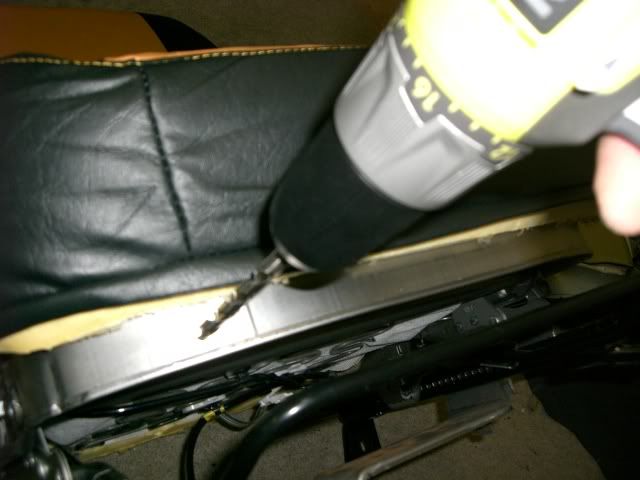
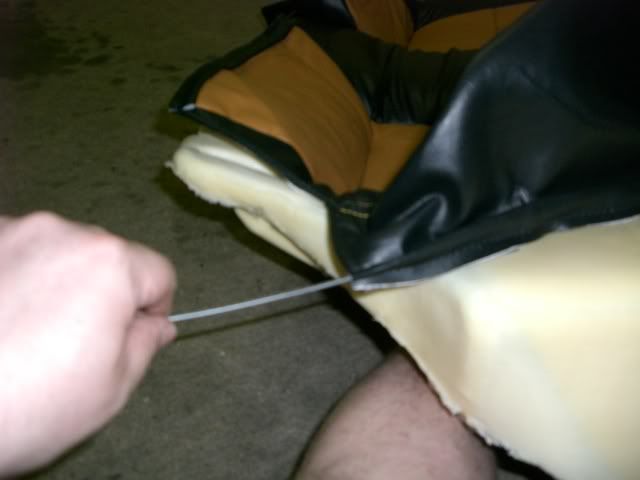
The new seat covers have places to insert wire to strengthen the C-clip joins you will make on the seat frame. Bend over the first 2mm of wire to get a nice smooth nose to slide along, if you don't it will get caught on the way.
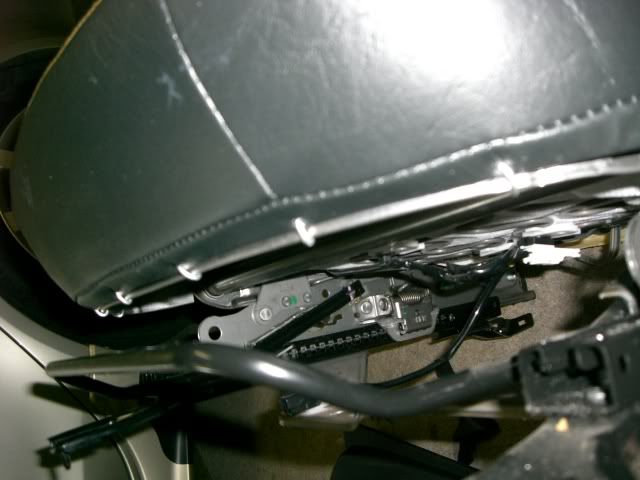
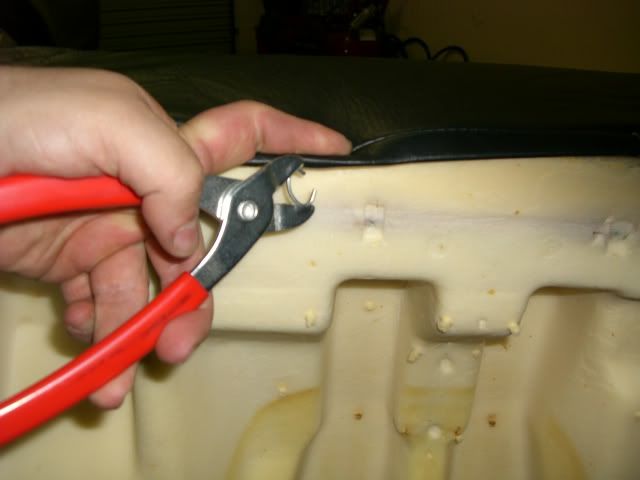
Once you have the wire in, slide the cover over from the back, careful to reattach the centre tuck bars with C-clips. Then do the periphery or edge.
And to finish.
You basically do this for all the pieces.
Note, I didn't remove the cover for the armrest, side bolsters or the headrests. Leave them in place, no problem. The trickiest part is the removal and reinsertion of the armrest/armrest backing plate...
Once you have all the pieces C-clipped, you have to make cuts to put the headrests back on and reveal the buttons for dropping the seats. All you have to do is gently stab in the centre of the hole with your good scissors, then make a a cross shape, but smaller than the article your are revealing.Then you push the cover down and around under the article and tuck in. It will be a very tight fit and the effect is like factory.
I have only done the back seat last night. Started at 5pm and was done by 10pm. I would allow a full day to do all the seats.
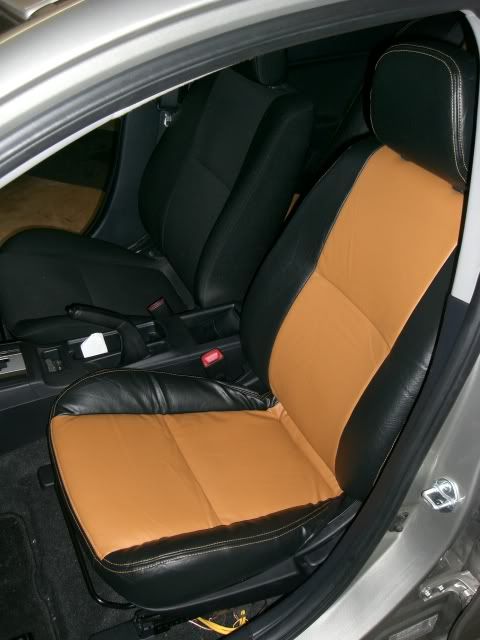
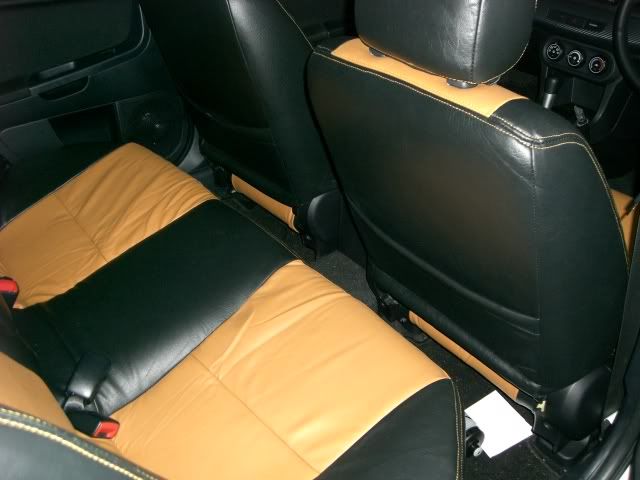
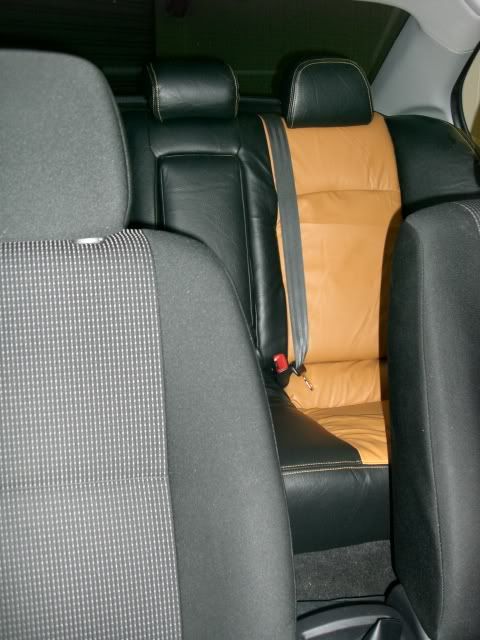
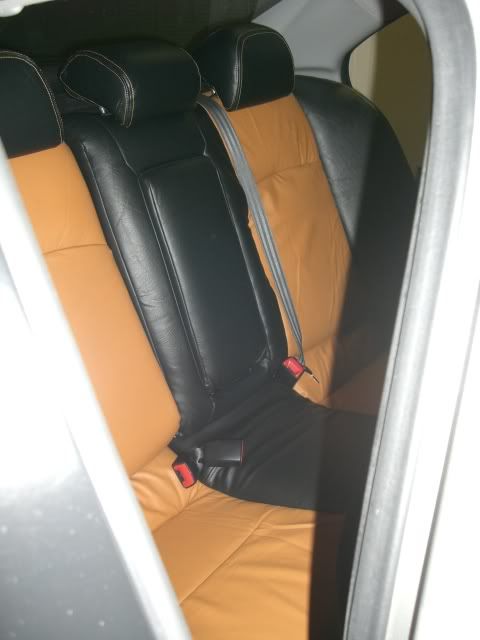
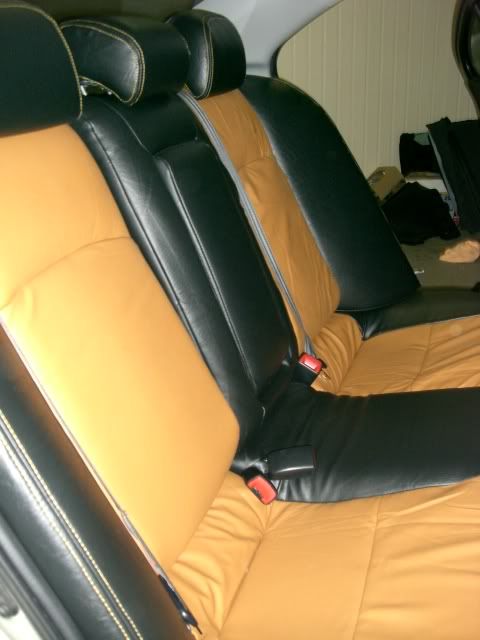
Old and new.
I will get onto the fronts today.
This DIY is not meant to showcase the colour, nor seeking comments on my choice... its just a DIY! I really don't care if you like the colour combo or not.
OK, that out of the way, you can find several dealers in this type of re-trim on eBay... I wont mention my choice here, PM me if you require.
You will need some tools, patience and basic skill. Source all your tools before you start because the seats will come out!
You will need sockets (to remove seat bolts), pliers, tin-snips or cutters (for cutting the C-clips), a philips screw driver, good scissors, a C-clip tool, C-clips (bag of 500 should do), some 2.5mm wire (comes in a 24m roll). Here is a picture of the tools.
Now, start by removing the 5 parts to your back seat. Choose a part (I started with the bottom seat cushion) and remove the original trimming, using the tin snip/cutters on all the C-clips. Carefully remove all metal shards.
All removed.
The new seat covers have places to insert wire to strengthen the C-clip joins you will make on the seat frame. Bend over the first 2mm of wire to get a nice smooth nose to slide along, if you don't it will get caught on the way.
Once you have the wire in, slide the cover over from the back, careful to reattach the centre tuck bars with C-clips. Then do the periphery or edge.
And to finish.
You basically do this for all the pieces.
Note, I didn't remove the cover for the armrest, side bolsters or the headrests. Leave them in place, no problem. The trickiest part is the removal and reinsertion of the armrest/armrest backing plate...
Once you have all the pieces C-clipped, you have to make cuts to put the headrests back on and reveal the buttons for dropping the seats. All you have to do is gently stab in the centre of the hole with your good scissors, then make a a cross shape, but smaller than the article your are revealing.Then you push the cover down and around under the article and tuck in. It will be a very tight fit and the effect is like factory.
I have only done the back seat last night. Started at 5pm and was done by 10pm. I would allow a full day to do all the seats.
Old and new.
I will get onto the fronts today.